5 Tips to keep your OneDrive lean

Microsoft365 may be introducing all kinds of shiny new functionality, your good old OneDrive is as important as ever. More and more information is being stored on OneDrive automatically and by default, so it may grow even without you consciously adding and uploading Word, Excel and PowerPoint files.

This could be an issue especially for users with an F3-license as they have only 2 GB of storage space at their disposal. Their OneDrive may get full quickly and that is rather a nuisance.

But also the 1 or 5 TB of E-licensed users will fill quickly if they have a long career in this organization and never a clean-up moment.

So, the following may be of interest for all:

1. Understand what is “private” and what is “shared” (and what is in between)

Although information on your organization’s OneDrive is never truly private, we consider files and documents that are only for you, private. This can be drafts of documents you are writing, your yearly objectives and evaluation, correspondence with your manager, etc.

Documents or files that you work on with others, are shared and should therefore live in a shared environment such as Teams or SharePoint. Or Viva Engage (the application formerly known as Yammer).

That said, there are still many items stored on your OneDrive that may be shared, but are still added to your OneDrive by default, such as Recordings and Whiteboards of Team Meetings and Files and Loops that you have shared in private Teams chats, and attachments from Forms.

Suggestion: instead of creating a new draft document in your OneDrive, create it in SharePoint, if it will be shared at the end. You may want to set up a document library especially for drafts. You can move it to its final place once it has been reviewed and made official. This way you will not have any old and forgotten drafts in your OneDrive.

2. Understand what is stored on your OneDrive

OneDrive has the habit of creating new Folders by itself when you do certain things in Microsoft365. The most well-known may be the folder Attachments, for files you have received as attachments to Outlook. Microsoft Teams is also a good source of automatically created folders, as Recordings, Microsoft Teams Data, Microsoft Teams Chat files, Transcribed Files are all added from your work with Teams.

Again, content you share with others in private Teams chats, will be stored in your OneDrive. It makes perfect sense, but it is annoying if your OneDrive is prone to overflowing.

Some time ago I wrote about the folders that are automagically created in your OneDrive:

Who created those folders in my OneDrive?

These folders have all been created by my use of Microsoft365. I have not created any of them myself.

Suggestion: Avoid private Teams chats and work in Teams Channels where possible. Create Channel meetings (when you know they will be recorded), chat and share files and Loops etc. in Channels so they will be stored on SharePoint rather than your OneDrive.

3. Understand the new Syncing

A new way to sync documents is on its way. I do not know the details yet, but keep an eye out, please! I learned this from Paul Keijzers’s video.
Synced SharePoint folders will then be stored in your OneDrive on your PC, if I have understood correctly. This may mean that your OneDrive also gets clogged up with SharePoint files. It may also mean that just the links will be shared, so I am curious to learn more.

How will SharePoint sync behave in future?

4. Understand what happens when you leave

Your next career move may not be top of mind right now, but it is good to know what will happen to your content when you leave the organization and your account is deleted. This may help you create new habits now.

I wrote about this earlier:

Leaving the organization gracefully

Suggestion: check on a regular basis if there is any content that would need to be in a SharePoint site or Teams, in case you would leave. It will save you time when you actually leave.

5. Clean up your OneDrive on a regular basis

Yeah, I know this is not exactly a fun task, but if you do this regularly, let’s say once a month on a quiet time of the week, it will be less work and will save you from the panic that will engulf you when you get a message that your OneDrive is full and you can no longer add new info.

I have also written about this topic:

9 steps to clean up your OneDrive

Other tips, tricks and suggestions?

Please let me know if there is something that you do, or your organization does, to keep OneDrives in check.

Number 5 by Pramit Marattha on Pixabay

7 more things to know about the SharePoint News digest

This is an update on my earlier post “10 things to know about the SP News digest” as we have learned many new things about this functionality in the mean time.
I expect that many senders of News digests will also be News publishers and sometimes even Site Owners, so you may also want to read my recent post “10 more things to know about creating SharePoint News” .

1. You must have Contributor or Edit access in a site to be able to create and send a newsletter

A News digest is a page in your Pages Library, and you need permissions to create a page, add an image to the Assets Library etc.

If you are a reader in a site, you will not see the “Create a News digest” option. I wrote about this in “SharePoint Holmes and the Lost Link“.

Screenshot of SharePoint News where person has read access only - they will see the "See all" link on the homepage but when they click it they will not get an option to create a News Digest.
This person only has Read permissions and can therefore not create a News digest.

2. Do not panic when you do not see the “See All” button

There may be a glitch with the web part settings, such as described in my post “SharePoint Holmes and the Disappearing Digest Link

  • The Site owner has used the Hub layout for News (I could not reproduce this anymore, so this may have been a bug that has been fixed)
  • The Site Owner has deselected “Show title and commands” in the web part
Screenshot of News web part where the "Show title and commands" button is turned OFF.
If “Show title and commands” are OFF, you will not see the “See All” link, regardless of the number of posts.
Screenshot of SharePoint News with the "Show title and commands" button OFF, this means you will not see the "See all" link to create a News Digest.
No “See all” after publishing a News web part with the “Show title and commands” OFF.

And then there is the “number of posts” issue. This is the explanation from Microsoft: If you don’t see the See all link, it could be that you don’t have enough news posts published for the option to be available. See all shows only when the number of news posts you have published is greater than the number of posts set to show in the Number of news posts to show option of the News web part. For example, if you have only 2 news posts published, and you set the option to display 4, you won’t have a See all link in the news section.

3. Make it a habit to use the Description field for a good summary of the post

Your audience will appreciate a Newsletter that provides them with useful info and does not waste their time. A good summary in the Description can help, as this will help them determine if title and summary are sufficient information, or if they want to read the full post. The Description from the News page will also be displayed in the Digest.
If you do not publish News posts yourself, you may want to teach your publishers about the use of the Description field.

In the example below, item 1 has a short summary that tells you exactly what Project Peony is about, item 2 blabs on about the project itself and tells you nothing about the purpose.

Screenshot of two identical SharePoint News posts, one with a good summary in the Description that tells you immediately about the post, one with the default description which is not as informative.
Item 1 has an optimized Description, with a nice summary, while Item 2 has the default first lines of the body text.

Read more about the Description field in my post: “7 things to know about the Description field in SharePoint pages and news“.

4. You can send one Digest from various news sites

Suppose you normally publish in and send a Digest from the Intranet site. Now you want to send one Digest from your Intranet News posts, with one or more items from one or more different sites. This can be done by adding a link to news that lives in another site, or even on the internet, or by including all News from one or more other sites permanently.

You have three options, see the screenshots below. You can find more elaborate info in my post “Combining SharePoint News from different sites“.

  • Add a News Link (to one News post from another location) is best for a one-off News post
  • Use News posts from one or more other sites if you want to permanently include News from one or more other sites in your News
  • Use News posts from all sites in the Hub if your site is a Hub site
Screenshot of SharePoint News with the place where you can find the "Add News Link" option.
For a one-time addition of a post from another location, you can use the Add News link option.
Screenshot of SharePoint News web part settings where News from two additional sites has been added to the News from this site.
If you want to show all News from one or more sites, you can add more sources permanently.
Screenshot of SharePoint News web part, where the site is a Hub site so you can select to show News from all sites in the Hub.
If the site is a Hub Site, you can show News from all sites in the Hub

Please remember that links in the Digest will go to the original posts when clicked from the site or the Digest. Make sure that everyone has access to all sites featuring in the Digest!

5. 🥳🥳🥳There ARE options to format the Digest email! 🥳🥳🥳

Microsoft is still in the “promise” phase for any formatting options, but Veronique Palmer has found a way to format it from the Outlook Desktop app – now that is neat! I tried it with Outlook-on-the-web and you can do a few things there as well!

In short, you can reformat while you forward the digest. This is a good way to change the colour scheme and perhaps add different logo’s (I could not make that work but that may be just me or a limitation of Outlook-on-the-web)

So, this is the Digest email that I receive in Outlook on-the-web.

Screenshot of the original News digest email
The original Digest email, it is a bit boring and has a lot of Microsoft branding

When I forward it (and perhaps change the sender from myself to an organizational mailbox such as “Communications” to make it more formal) I can edit the header. In this case I removed the Microsoft and SharePoint logo’s, edited the text and added a background colour.

Screenshot of formatted SharePoint News digest email, without the logo's and Microsoft references, with a different header colour and some edited texts.
I can do some formatting, even in Outlook for the web!

This is the reformatted email after sending:

Screenshot of reformatted news digest email. It looks a bit more colourful than the original.
The reformatted email. It looks a bit less bland!

6. The Digest will always be sent from your personal email address

SharePoint is personal, and any Digest will be sent from your email address. (Unless your Communications Department has a separate Microsoft365 license, but I think that is not good practice).
If you want to send a Digest on behalf of the Communications Department for instance, please first send the Digest to the Communications Department mailbox. From there, you can forward it to the intended audience.
This procedure will allow you to:

  • Shorten the title.
    By default the Digest title will be “[Creator] shared [Digest Title] with you”. By forwarding you can shorten that to just the Digest title.
  • Add the audience to the BCC field.
    This will keep the damage of any “Reply All” actions limited. There is no option to send as CC or BCC from SharePoint.
  • Format the email, see item 5!
  • Treat all emails from the Communications Department consistently (e.g. filing, archiving, etc.)
Screenshot from the Digest creating process. There is only a "To" field in the Digest, no CC or BCC.
There is only a TO field in the Digest, and it will always be sent from the person who creates the Digest.

But make sure to remove any earlier sending info!

Screenshot of News digest email when it is received and being forwarded. At this stage you should edit the title to make it more compact, and remove the sending info from SharePoint to the first mailbox.
When forwarding, please edit the title (1) and remove the sending into from the mail (2).

7. Be aware that not everyone may receive your News digest

That may be because of a problem with your email server, it may end up in Junk Mail, it may be an accident and some readers may have intentionally blocked you because they do not want to receive “more organizational stuff to read”.
I have listed a number of possible reasons and troubleshooting in this post: “Why does my SharePoint News digest not reach my colleagues?

If you are starting with a regular newsletter, I would suggest you inform your audience about the reason and value, and show them how to check their Junk Mail or Archive. It can also be helpful to run a survey now and then, so you can finetune your Digest.

What have I missed?

So, have you found any other “things to know” about the SharePoint News Digest? Please let me know!

The 7 from the image is sourced from https://www.freepnglogos.com/images/number-7-36599.html

Why does my SharePoint News digest not reach my colleagues?

Since a few weeks I am also on Mastodon (@ellenvanaken@mastodon.social) and there I happened upon this question from @almostwitty:

“Does anyone know how to manage the SharePoint “News you might have missed” feature? Some people aren’t getting them and I have no idea why…”

I thought that was a great question, so I started investigating, including the regular News Digest option as well, since issues can occur there too.
I focused on technical/functional reasons, reading “not getting them” as “not receiving them in their mailbox” rather than not understanding what they are about. (But there’s an explanation on how it works from Microsoft in this post as well!)

There are three levels where email newsletters can go wrong: organizational (because of settings or email issues), sender or recipient issues or actions.
In the case of organizational issues, most likely the whole organization, or a specific part of it (e.g. a specific email domain or location), will not have receive the digest.
In case of individuals who have not received it, the issue is harder to identify and solve.

A. Regular News Digest

This is a newsletter with a hand-picked selection of news, sent by a site owner (sender) to an email list or group of colleagues (recipients). You may want to check my earlier post “10 things to know about the SharePoint News digest”
Always think carefully before you decide to send a News digest – not everyone likes to receive “even more stuff to read” from their organization!

In the following cases someone or more people may not receive it:

1. Organization: There has been an email glitch in your organizations Outlook/Exchange

Check with your Microsoft365 admins if this is the case. The glitch can affect all your organization, or parts of it, e.g. with a different email address.

2. Sender: You have exceeded the Outlook sending limitations

Check the sending limitations here. E.g. you have sent your newsletter to more than 500 people, of you have sent too many emails in one day. The limits appear to be lower for people who have been in the organization shortly and have no reliable reputation yet.
Solutions may be to send the newsletter in smaller batches, to use organization-wide groups instead of individuals (any group that is in your Company Directory), or to send the newsletter from a different email address. (e.g. a department mailbox rather than your personal email)

3. Sender: you have more than 256 characters in your subject line

See all Exchange Online limitations (link below) under “Messaging limitations”.
A more complete, but more complicated overview of all Exchange Online limits here.

Please create a shorter subject line.

4. Sender: your digest mail is seen as Junk Mail

This has happened to me when I first sent some digests, because I sent it to a lot of people who had never had any interaction with me.

Please inform colleagues that you are starting an email newsletter, monitor delivery of your first digest, train your colleagues how to add senders of in-company newsletters to their safe senders and ask them to check their Junk Email folder on a regular basis.
It can also help to send the digest not from your personal email, but from an organizational account, e.g. Communications, or Department XYZ.

5. Recipient: Has deliberately blocked your email address, reported earlier newsletters as Junk and/or has set a Rule to send your mails to the Deleted Items

While option 4 is more or less an accident, this one is a deliberate action. There is no “Unsubscribe” option for SharePoint News digests, so every employee who is not happy to receive and read your mail will find ways to avoid it. Your digest will probably be in their Junk Email or Deleted Items.

It may be good to inform colleagues about the benefits of the News digests. Additionally you could train them how to add senders of in-company newsletters to their safe senders and to to check their Junk Email folder on a regular basis.

6. Recipient has accidentally deleted or archived the mail

Sometimes I do that too – I delete something by simply pressing the wrong button, swiping the wrong way, etc. Sometimes it is because I am interrupted while reading email, sometimes I decide too fast that this is not interesting, it can be anything really, and nothing personal! 😊

The email may be in the Deleted Items or in the Archive.

7. Recipient’s mailbox is full

Especially when your organization has many F3-licenses, it may happen that their mailbox (only 2 GB) is full and can no longer receive emails, even though the News digest is a small email in size. Check out the Quirks of the F3 license.

There’s not much you can do there. The recipient will have received one or more warnings to clean up their mailbox.

B. News you might have missed:

This is an automated digest of items that you have access to, may be relevant for you (according to the Microsoft Graph) but have not read yet. More info from Microsoft.

In this case, there are only organizational or recipient issues. People may not receive this for the following reasons:

8. Organization: it has been disabled on organizational level

Microsoft provides information on how to do that. You may want to discuss with the Microsoft365 admins (and others involved) to turn it on again, because there may have been a good reason to disable the functionality.

9. Organization: There has been an email glitch in your organizations Outlook/Exchange

(Similar to 1.) Check with your Microsoft365 admins if this is the case. The glitch can affect all your organization, or parts of it, e.g. with a different email address.

10. Recipient: There is no news that they have missed

They may have read all there is to read. That may be because they have been a colleague for only a short time and does not have access to many sites yet.

11. Recipients have turned off their subscription in the email or on their SharePoint page

This is ON by default. At the bottom of the email there is a link called “Notification settings” that takes you to a page in the SharePoint homepage where you can disable this digest.

Screenshot of the bottom of the "News you may have missed" email, with the link to change your notification settings.
You can disable this automated digest here.

You can also do this from the SharePoint home page by clicking the gear wheel > Email notification settings.

Screenshot of the SharePoint landing page and the menu under the gear wheel. With "Email notification settings" you can turn the digest off.
On the SharePoint landing page you can also turn off this digest.

In both cases, you will go to the below page where you can toggle off the button at the bottom.

Screenshot of the Notification settings page where you can determine if you want to receive "News you might have missed" or not.
If you do not want to receive “News you might have missed” you can set this button to “Off”

12. Recipient: Has deliberately blocked noreply@sharepointonline.com, reported earlier digests as Junk and/or has set a Rule to send mails from this sender to the Deleted Items

(Similar to 5.) This is a deliberate action. The digest will probably be in their Junk Email or Deleted Items.

You may want to inform users that blocking noreply@sharepointonline.com is not a good idea, as they will also not receive other mails about their SharePoint sites and documents. (e.g. auto-deletion of Teams recordings) Creating awareness about this email may be good idea, as is teaching them how to disable the “News you might have missed” email instead, as explained in 11, if they really do not want it.

13. Recipient has accidentally deleted or archived the mail

(Similar to 6.)

The email may be in the Deleted Items or in the Archive. Again, creating awareness about this email may be a good idea, and you may also want to teach them how to disable it properly if they do not want to receive it.

14. Recipient’s mailbox is full

(Similar to 7). The mailbox of F3-licensed users (only 2 GB) may be full and can no longer receive emails, even though this is a small email in size. Check out the Quirks of the F3 license.

There’s not much you can do there. The recipient will have received one or more warnings to clean up their mailbox.

Conclusion

There are many reasons why someone does not receive a SharePoint News digest or a “News you might have missed” digest. The reasons can be on organization, sender and recipient level, and may be deliberate or accidental. That makes it hard to troubleshoot, but I hope I given you a few ideas to start with. Good luck!

Please let me know if I have forgotten any!

SharePoint Holmes and the Invisible Illustration

Creating news in SharePoint is relatively simple compared to publishing on the old intranet, our news publishers have informed us. They especially like the many easy options to add images and web parts.

Still, the other day we got a small mystery to solve.

The case

One of the News items showed a strange header image. The publisher told us that she saw the illustration as intended, and that she had used the standard “Image and Title” template because she wanted to use a header image. The rest of our organization saw a grey/white image instead.

Strange image in the news post, not what the pusblisher intended!

She told us she had followed all the steps she usually did.
Time to wrap up in my SharePoint Holmes cloak!

The investigation

I looked at the news post but I could not see anything wrong with it, not even in admin view.

I checked the Site Assets library where images used on Pages are stored, but there was no folder with the name of the news post. This could either mean the image had not been uploaded, or that she had used a selection option that does not create a folder in the Site Assets. (More on that in my next post)

All images used on pages and news are stored in the Site Pages folder in the Site Assets library.

I then asked if she could reproduce her steps while I was looking, as just looking at people’s actions can give you a ton of extra information.
When it came to adding the header image, she selected “OneDrive” and selected the image of choice. She got a popup and clicked “OK” before I could read the message properly, so I asked her what the message said. She said she just clicked “OK” as this added the image to her post, and she had found that if she clicked “No”, she would go back to the image selection and had to start again, so that made no sense.
She then published the news post and it showed correctly on her screen, like this:

The News publisher sees this image from her OneDrive

But not on mine or anyone else’s.

This is the “image” everyone else sees.

It was time to look at that popup. This is it:

When you use an image located on your OneDrive, you need to share it with everyone in the site.

So, if you want to use an image from your OneDrive, which is private by default, you need to share it first with your intended audience. This makes sense, but there is no way to share it while you are in the process. Clicking “OK” assumes you have shared it, clicking “No” brings you back to the image selection. It would be nice if you could adjust the permissions then and there, like you can do with documents you upload in Teams chats!

The solution

In this case, I suggested to use the “Upload” option and select the image from her OneDrive client on her PC. This will upload the image and create a folder with the illustration, shared with everyone who has access to the site.
She could also have uploaded the image to the Site Assets in her news site, and then select “Site”.
It is also possible to share the illustration with everyone on her OneDrive, before adding it to the news post, but I thought that was too complicated. Not everyone knows that “Everyone except external users” is the group to share it with.

To fellow support folks:

Please notice the difference between adding a OneDrive “image” (1) and not adding a header image (2). This can help you find out if this is a similar case.

1: OneDrive image, not shared. 2: No header image (and no other images) added to the post.

My next post will discuss the various image upload options, so stay tuned!

About SharePoint Holmes:
Part of my role is solving user issues. Sometimes they are so common that I have a standard response, but sometimes I need to do some sleuthing to understand and solve it.
As many of my readers are in a similar position, I thought I’d introduce SharePoint Holmes, SharePoint investigator, who will go through a few cases while working out loud.

Intranet demo videos

For the past year-and-something I have been unable to add Vimeo videos to my List.ly collection, as they did not show well. Yesterday I tried again and it turns out it works again. The only problem is that they have changed their business model, so I can only add new videos to my existing list until I pay…

Let me share some recent finds with you, while I ponder what to do. (Suggestions welcome, although the thought of moving all those vids to the 4th platform does not really make me happy; the thought of paying is not much better 🙂 )

As we are launching our intranet in a few weeks, I have decided to do only demo’s this time.

1. The Vine (Financial Services, USA)

Intranet demo for a bank. The intranet looks quite friendly, and not very corporate. It has to do with the font that they use for headers. Interesting to see that makes such a difference! The intranet has many pages and a deep structure, from the look of menu’s and all.

I like the request to update your profile, although they ask too many things, in my opinion. But hey, if it works for them, that’s all that matters!

Tip for presenters: do not move your cursor around too much while talking. It can make your audience restless. Instead, try to keep your cursor at the exact item you would like to show.

Uploaded March 2021.


2. 4Cs Connect (Insurance, UK)

I really need to make a list of all intranets called “Connect”. There are so many! 🙂 This one is based on SharePoint.

Very nice overview of this intranet, which looks pretty clean and has a megamenu in the top navigation. It explains the basics in a straightforward way, together with text balloons. The voice is a tad mechanic, I wonder if the narrator is trying too hard be very neutral.

I realy like the clear and concise explanation of the search function, the call for feedback, and the instructions for mobile. It is really a good inspiration for our own video-to-be! s

Uploaded August 2021.


3. Intranet for VIB (Flemish research institute – Belgium)

Well, this must be computer-spoken as the words sometimes have an incorrect intonation. This makes it a bit boring to listen to.

Clean-looking intranet, with several personalization options and a very nice People finder! (Microsoft, can you take a good look, please?) I also like their Roadmap, and the fact that it is visible to everyone.

Uploaded: June 2021.


4. Sioen (Industrial textiles – Belgium)

The spoken word in Dutch, with English subtitles. Now and then you will see that it has been built on SharePoint.

I really like their shared documentation, such as standard materials, business presentations, templates and logo’s. Having those in one central place can save everyone time!

Uploaded June 2021.

That’s it for this time, folks!

Organizing a Teams Webinar with an F3-license

The Teams webinar functionality has rolled out. Many things have already been said about it (Mike Tholfsen’s video says it all really) and basically it is a regular Teams Meeting with a registration form and very limiting meeting options, so it was both a relief to me (“oh good, it works like a Teams meeting”) and a disappointment (“oh, it works like a Teams meeting, what is all the fuss about?”) when I investigated it.

However, F3-licensed users do not have the option to create a Webinar, just as they can not create a Live Event. Our E3-licenses users have three options when they click the New Meeting option: Schedule meeting, Webinar, Live event. F3 users only have New Meeting option.
They can of course use a regular Teams meeting for any webinar, as described in my earlier post, but seriously, they can use the webinar option as well! Here goes:

Webinar creation for E3-users. F3 users only have the New Meeting button.

1. Create the event

  • In your Teams calendar, click New Meeting. The invitation screen will open.
  • On the top right, you will see an option “Require registration”. Select “people in my organization”. “(If you want to make this available for external attendees, you may need to create a Form for registration – remember to make this available for everyone)
Click the arrow and select “For people in your org” to create a registration form. F3-users can not create a registration form for everyone.
  • Leave the registration form for now, as that can be done later when you can give it your full attention.
  • Add all relevant event details, and invite the presenter(s) only.
Make sure you only invite the presenters.
  • Send the invitation to the presenter(s) and the event will be added to the agenda of yourself (the organizer) and the presenter(s), looking like this:
a Webinar looks like this in your calendar

2. Edit the registration form (attendees from your organization only)

  • Open and edit the event from your Teams calendar and click “Customize registration form”.
  • Op the top left, click “Edit”
  • Adjust the registration form – make sure date and time are correct (it does not always copy correctly!!!) and you can add a picture, add speakers, and (optional) ask a few extra questions.
The registration form – you can add all details and even a picture! Check if date and time have copied over correctly!
  • Click “Save” top left, and “View in browser” to see what it looks like. Adjust when necessary. Copy the registration link to distribute to your audience.

3. Adjust the meeting options

  • Open the event from your Teams calendar and click Meeting Options or Change Options
Two places to change the meeting options
  • Adjust the meeting options until they look like the screenshot below and click “Save”.
  • If you do not want to be bothered with adding people from the lobby, make sure you set Lobby to “everyone”.
These are the standard Meeting options for a webinar.

4. Advertise your webinar

Make sure that your audience knows about the webinar. Share the information and add the link to the registration form in and outside your organization. You can use the intranet, a SharePoint site, Yammer, email, social media, an external website, a printed flyer with a QR code, whatever is relevant.

5. Check registrations

The registrations will be added in a nice list in the Details tab of your event.

You can keep track of registrations from your calendar

6. Before the webinar

  • Download the Teams desktop app from the Microsoft Store. F3-licenses users use the web and mobile apps by definition, but the Teams desktop app is free and gives you a ton of extra control options for your event. Download, log in and familiarize yourself with it.
  • Plan your break-out rooms (desktop-app only) and add any Polls that you would like to use during the webinar.

7. During the webinar

  • A little before the start time, open the Teams desktop app and click “Join meeting” from one of the usual places
  • Proceed as in any other Teams meeting
  • You can add Polls, use breakout rooms, and what not, just like any regular meeting
  • If you want to allow live questions at the end of the webinar, open the Meeting options (… in the Meeting control bar) and allow microphones and cameras to be opened up (Teams desktop app only)
Options available for the organizer in the Teams desktop app

8. Attendance report

The attendance report will be on the Chat tab, as usual.

Good to know:

  1. That little lectern icon appears on events which require registration, only in the Teams calendar. Check out the second and third screenshots from the top to see the difference!
  2. When you have selected registration “for people in your organization” only, their names and emailadresses will be added automatically when your colleagues open the registration form.
  3. There has to be a presenter in the Meeting options, otherwise you can not save the Meeting options. When the organizer is the presenter, make sure you select “Only Me” as the presenter.

Conclusion:

Every F3-licensed user can create a Teams webinar, with one limitation and one manual action compared to an E3-user:

  • The F3 license has no option to create a registration form for externals – you will need to use Microsoft Forms to collect registrations.
  • They will need to adjust the Meeting Options manually.
  • Using the Teams desktop app (free from the Microsoft Store) gives you many more options to control the event.

Good luck!

The importance of being Organizer

The person who organizes a Teams meeting has become more and more important over the last few months. Many recent improvements are available for the organizer only.

Yes, so what?

Indeed, many meetings can be done without the organizer being present. Our team’s daily call, for instance.

But it can be an issue for situations where you need special things and the organizer does not plan to attend the meeting, e.g. a secretary who plans meetings for the manager or other people in the team, or our Convention Bureau who organizes webinars as a service for our education institute.
In case you want to see who has attended a meeting, for instance, the organizer needs to be there to download the report. Also, the much awaited break-out room functionality can only be used by the organizer!

Unfortunately, the organizer role is not transferable, which also means that when the organizer of a recurring meeting changes roles, the meeting has to be cancelled and set up anew, especially if the audience of the meeting changes. While this has long since been the case for all meetings, with everyone meeting remotely with Teams it has become more visible. There’s a User Voice item to have the ability to transfer this role to someone else.

Awareness is key!

There’s not much we can do about it right now, except making everyone aware, that you need to think who will setup the meeting, especially the larger and more important events.

Microsoft has published a list of roles and responsibilities, but that is currently not complete. So I have created my own roles mapping for you to use. I will keep this updated as “who can do what” is important! (Please feel free to download for re-use)

Preview of what to expect when you open my document

Of course, options are not only depending on role, but also on the app used. Microsoft has an extensive overview for that.

But wait, there’s more:

During the creation of the list I found another variable:

  • Is the participant from your organization or not?
  • If not, do they have a Microsoft 365 account or not?

OK, so that’s my homework for next time! 😉

Update November 22, 2020: I have posted my findings about this, and updated the roles mapping!

Title inspired by “The importance of being Earnest” by Oscar Wilde.
I have once played the role of Lady Bracknell!
😁

Teams meeting recipes

Since the start of this year, many extra controls have arrived in Teams meetings. We all remember the stories from early lockdown of students muting the teacher, or removing other students from the meeting, just because every Teams meeting was a free-for-all by default, which is of course excellent for regular business collaboration (its original purpose), but less than perfect for other situations.

By now there are a lot of extra ingredients to create a Teams meeting that is exactly suited for purpose:

Lobby, presenter/attendee roles and muting options.

As we have a lot of different meeting types, and I am often asked for advice on how to set up a particular type of meeting, please allow me to share a few “recipes” for different types of meetings, from “no boundaries” to “tightly controlled”.

1. The recurring team/update meeting

These (default) settings are perfect for a recurring meeting for a well-established team. Within my own team we have these settings for our 3-times-a-week-meeting. We mostly talk, but occasionally share screens so it is nice if we all can do that when needed. We only use special features to test them if they are new (we used Spotlight a few times this week), or for the occasional prank. Everyone knows how to mute that colleague whose dog starts barking, and everyone does that when needed.

Who can bypass the lobby? People in my organization

Who can present? Everyone

Allow attendees to unmute: Yes

2. The formal meeting

This is usually a one-off, carefully planned meeting with known and sometimes unknown business partners. As it generally does not have too many people present and should be collaborative, everyone will need to be able to speak, but not necessarily present or do anything else that a presenter can do.
If it is a recurring meeting with known externals, you may want to remove the lobby barrier, but I do not think any external contact will feel offended if they have to wait until someone admits them.
If plans need to be discussed, screen sharing will be more important than Spotlighting the speaker. (It’s one or the other; if you Spotlight someone their presentation will be just another tile in your gallery of people present.)

Who can bypass the lobby? People in my organization (occasionally: Everyone)

Who can present? Specific people

Allow attendees to unmute: Yes

3. The group therapy session

As mentioned earlier, we allow Teams to be used for group therapy sessions as long as in-person sessions are not feasible and our preferred tool can not accommodate larger groups. These sessions are led by one or more of our therapists, and attended by clients, who are externals.
The therapists need to be able to take measures when the group is too noisy or needs to focus their attention, so the occasional Mute All (with the option that a client can unmute) will be helpful, as will the Spotlight option to focus attention to a therapist. This will also reduce visual clutter and movement, as some clients are sensitive to that.

Who can bypass the lobby? People in my organization or Only Me, provided the therapist is the organizer (but that is not always the case).

Who can present? People in my organization

Allow attendees to unmute: Yes

4. The large team event

The autumn season always has a lot of large meetings, both as a get-together for teams after the summer holiday period, and as a starting point for plans for the year ahead. We have recently seen a lot of virtual get-togethers for these purposes.
As these sessions often contain many people, and generally need to discuss too many topics in too little time, control is needed. As are breakout rooms!
Spotlights can be useful to highlight a speaker, as well as Mute all.

Who can bypass the lobby? Only Me or People in my organization.

Who can present? Specific people.

Allow attendees to unmute: Yes.

5. The seminar, lecture, training, speech

Our education season has also started again, and with it the need to do this online. Now that Hard Mute is available, smaller events may be done in a Teams meeting rather than in a Live Event. For questions, you can use chat or allow unmuting after each lecture. Spotlight may be useful for a speech.
The Live Event has some advantages: the moderated Q&A, the option to see the presenter next to their slides, the fact everyone can focus on the presenter and they are not distracted by the videos or pictures of other attendees, etc. but for each event you could balance the easy setup of the Teams meeting versus the more complicated formality of the Live Event.

Who can bypass the lobby? Everyone (for education events) or People in my organization (for an internal speech).

Who can present? Specific people.

Allow attendees to unmute: No.

Conclusions

The new options are valuable additions to the existing toolkit. I especially like the option of Hard Mute, as it may allow some events to be done in a Teams meeting rather than in a Live Event.

I am looking forward to making everyone aware of these new features, and helping organizers to mix the various options to make their own event the best possible experience.

Oh yes, and we are all SO looking forward to the break-out rooms!!!

How to organize a webinar with Teams

TeamswebinarNow that the initial shock of working from home, and learning to work with Microsoft365, has been absorbed, I notice that my colleagues are quickly trying to get their work done “with the new tools”.

My organization is also a research and education institute for nurses, psychologists and psychiatrists and other therapists, so we have a lot of research, knowledge sharing and training going on in our core business.
Suddenly I am being called frequently by colleagues who are used to organize face-to-face events, but want to set up a webinar now.

For the larger and more formal events we advise Live Events (which I am currently trying to get proficient in), but for smaller and less formal events a regular Teams Meeting can be used as well.

My own experience

My colleague and I are still giving webinars on the various aspects of Teams almost every week, using a Teams Meeting.

These take an hour, have up to 10 people, can also be taken in the evenings, and we make sure everyone can ask their questions. They fill up rather quickly!
We generally do a personal introduction round for all, then present a few explanatory slides, give a demo, recap what we have shown, and ask for final questions.
We have found that people like to sign up, because not only does it give them an opportunity to learn new things, brush up their skills, or allows them to ask their questions, but also because they like to connect with their colleagues, who they have not seen for more than two months by now. So it is fulfilling a social need, too!

For those situations a regular Teams Meeting does the work, so here’s how to organize that.

1. Create a Form to collect submissions

We have a professional tool available for the larger and more complicated events, but for smaller and impromptu webinars you can use a Form.
Just create one and share it with a colleague (as a back-up).
If you have internal attendees only, collect names and emails automatically.

Teamswebinar-internal
For internal purposes, this is the quickest option

If you have externals joining too, please make sure you use the setting “Anyone with the link can respond” and ask for (at least) their email address.

Teamswebinar-external
This is the option if you also have externals joining. Remember to add a field to collect the email address!

2. Communicate your event in the regular way

If you are sending emails, publishing on internet or intranet, you can add the link to the Form (or to the formal system) to collect responses.
If you are using printed materials (wall posters, flyers) you can add the QR code to the Form.

The Form will give you a spreadsheet with email addresses.

3. Schedule the Teams meeting

You can do this from Outlook or from Teams.

If you want to send the standard invitation to everyone, you’d better use Outlook as I have found this works better with contact persons, email distribution lists or Excel files with email addresses. Also, if you want to hide people’s email addresses, use Outlook.
You can add an attachment with meeting instructions – I liked this one for external users. How to join a Teams Meeting – as a guest

If you want to use another way of communication (e.g. an email with instructions and some more information), you can best use Teams, invite your presenters only and then add the link to the meeting to the rest of the information.

Teamswebinar-meetinglink
Just hover over the Join-text, rightclick and Copy Link to get the link to the meeting.

This post will tell you more on the pros and cons of Teams or Outlook when scheduling.

If your webinar involves breakout sessions, where attendees can discuss or work on an assignment together, you may want to check out this post for the creation of breakout rooms.

4. Set correct controls to your Teams meeting

For a presentation for a large audience including external attendees I would suggest to add a lobby for externals, and make sure everyone except the presenter(s) enters the meeting as an attendee.
Arrange the lobby and presenter settings as explained in my earlier post.

5. Send links and instructions

If you have used Outlook, you will have done this already, but in case you want to send a different email than the standard invitation, you can add the link as grabbed under 3 and add instructions. For internals it may not be necessary (although it may not hurt) and for externals you can use something like these:  a link or as a PDF: How to join a Teams Meeting – as a guest 

6. Prepare and rehearse

  • In most cases presenters will share a PowerPoint presentation, and it is a good idea to make a PDF version as a handout. We usually share these via the chat during the webinar. Be aware that external attendees can not access the chat when they have logged off, so tell them when you are sharing it.
  • If presenters are giving a web demo, it helps to have a script, so they know what they are going to show. They should keep the script visible.
    Making screenshots of the screens they plan to show (in case the internet or wifi drops, or the website is suddenly unavailable) is always a good idea.
  • And if they want to demo something on your phone, here’s how to do that.

7. Do a technical test run

It is always a good idea to practice a presentation a few times, but if the presenter is new to Teams it is essential that (s)he also does a “technical” test run to find out how to

  • share a screen or a presentation and switch between them
  • blur or change backgrounds
  • manage attendees
  • use the chat and the “raise hand” option
  • include system sounds like the sound from video’s, etc.

Teamswebinar-systemaudio
Make sure you check the “include system audio” box when you want to play a video or other sound.

If you have externals joining, invite one or two along for the test to see if it all works for them.

You may want to think about a custom Help background, as described by Phil Whitehead in this video, to help attendees use Teams.

8. Check audio and video just before the event

On the day of the event, the presenter clicks the link to the meeting well before time.

The Teams app has a Test call option, to check if audio has been set up correctly. Type /testcall in the Command bar and you will be taken to that old test call we know and ❤ from Skype. You will even receive a report!

Teamswebinar-testcall
So happy to have that Test call option back! You can do this from anywhere in Teams.

Of course the presenters have also turned off all kinds of sounds and on-screen notifications. You don’t want to know the email previews I have seen arriving while people were presenting. 😜

Please also ask presenters to check their hair, clothes and background before people enter the meeting. Of course they can blur or select a background, but it helps if they know they are not sitting in front of that flipover with the upcoming reorganisation or divestiture written out.

Ask them to close all tabs and programmes that they do not need today, so they do not run the risk of accidentally sharing something confidential or embarrassing.

Sonia Cuff recently published a good blog on being a remote presenter.

9. Good luck!

  • When the webinar starts, organizer or presenter gives everyone access from the lobby.
  • Once everyone is in, you or the presenter may want to instruct attendees on using the mute buttons and the chat and the “raise hand” function, if you are not using that Help background.
  • Tell people when you share the handout.
  • The organizer may want to download the attendance report during the webinar.

What have I missed?

Is there anything you would like to add?


Teams meetings for non-business users – invitations

Teamsclient-header
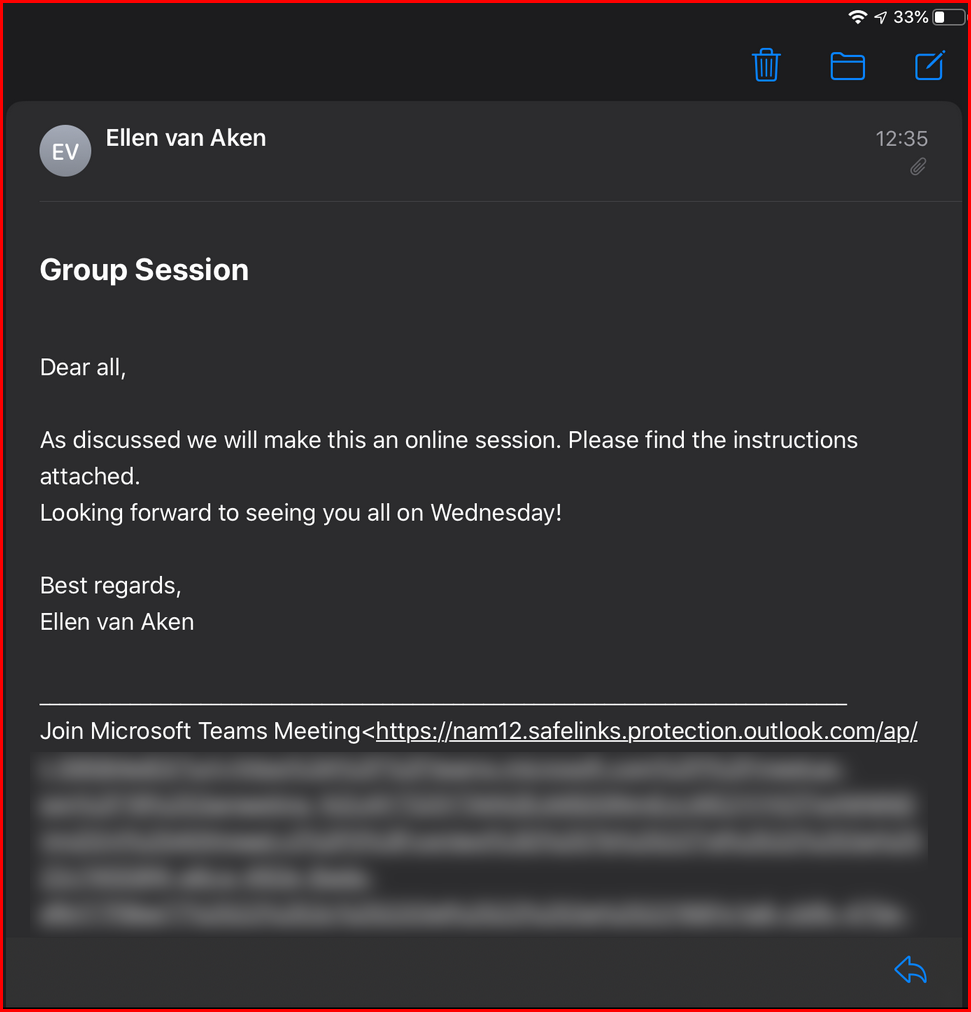
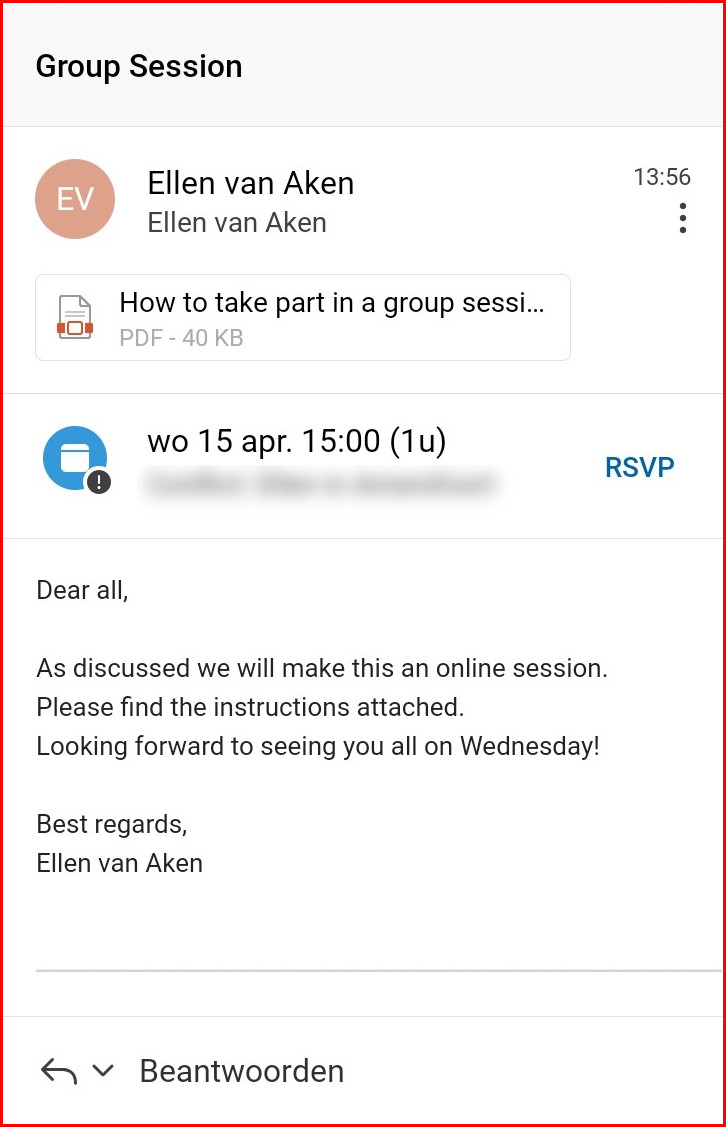
Teams may have originally been intended as a business-to-business meeting and collaboration tool, it is now, in COVID-19 times, used heavily for all kinds of gatherings. The education sector is using it big time, my own organization is using it temporarily as a group therapy session tool, and I use it to meet with my fellow “citizen activists” who want to keep our lovely home town a great place to live in for real people.

So, right now Teams is being used by many non-business people, and I have had a lot of questions about “how it works” for non-business external users, as in: “what do they get and what do they have to do in order to participate?”

The fun part when you use Teams for “consumers’ is the variety of systems that people use – devices, browsers, email clients. So, I tried a few things, starting from my own Office365/Microsoft365 tenant.

I created a meeting from Outlook Online, as described earlier.

  • It does not show attendees
  • You can not forward the invitation
  • Externals need to wait in the lobby
  • Externals are an attendee, not a presenter

I sent this to various online emailclients: Outlook.com, Gmail.com, Yahoo.com

I opened the mailboxes with various browsers on laptop and the Outlook one on Iphone and Ipad.

I looked at the invitation and accepted the meeting (where possible).

What does the invitation look like?

Teamsclient-OutlookChrome
Laptop/Outlook.com mail. This invitation looks the same in Edge, Chrome, Firefox and Internet Explorer. The yellow bar mentions that the invitation can not be forwarded. (in Dutch)

Teamsclient-YahooFirefox
Laptop/Yahoo mail. Invitation looks the same in Edge, Chrome and Firefox. Internet Explorer shows a basic version. There is no Accept/Tentative/Decline option and no mention of the non-forwarding. And what is that silly logo next to my name?

Teamsclientgmailchrome
Laptop/Gmail. Invitation looks the same in Edge, Chrome, Firefox and Internet Explorer. There is an option to respond, but no mention about the non-forwarding. Although the time is technically correct, it is not the “natural” Dutch time and I could not find a way to correct it.

Teamsclient-outlookapple
iOS: Outlook.com mail via Apple Mail app. Yikes, this is all you get. The top says: this message is plain text, download the full message. If you do that, you get this:

Teamsclient-outlookappleexplanded1

Teamsclient-outlookappleexpanded2
Well, double Yikes. While iOS is usually so cool and user-friendly, this is awful. You have to download the message to make sense of it, and then you get a ton of ugly links and then at the bottom your instructions and the .ics file. No mention of the non-forwarding.

Teamsclient-outlookandroid
Android. Microsoft365 account, Outlook app. Response options but no mention of the non-forwarding.

What have I found so far?

  • Do not expect a response message if you are inviting external non-business users. I did not receive any responses except from the Microsoft365 user, even though I did accept the meeting on Gmail and Outlook.com.
  • Invitations to Gmail often go into the Spam box, especially when I used the “hide meeting attendees” option. You may want to check with your externals that they have seen the invitation.
  • Check if the meeting is on the right date and time on the receiver’s end. If people have their mailbox on a different timezone, they may want to adjust it.
    Or in case of Gmail, do they realize that the time is in UTC and what UTC means? 
  • Tell people that the invitation may move out of their inbox after accepting or declining it and that they can find it in their Deleted Items if they want to keep it. 
  • Sending an invitation does not mean that the date and time are added to the Calendar option of the email client automatically. In some case you need to download the .ics file (which not everybody may understand) or specify to the email client that invitations should always be added to your calendar.
  • “Do not forward” appears to work only within Microsoft email – the option to forward is greyed out in Outlook, but the emails sent to Yahoo and Gmail could be forwarded and the recipient could enter the meeting. ☹
  • Please note that I have an up-to-date Windows 10 laptop with current versions of browsers – be aware that non-business users may have different setups and different versions!

Do not assume!

In other words, do not assume that everything will work in the same way as with your external business contacts. Your “consumer” audience has a much larger variety in devices, mail clients, updates and browsers than your business contacts (who in many cases use Outlook, if not the full Microsoft 365suite). Your “consumer” audience may also be less exposed to formal meetings and be not as tech savvy – or be more savvy with other systems than Microsoft365.

Next time, I will discuss what happens when you click on the meeting link