Why can Frontline Workers not add a Teams meeting to their meetings?

The other day I received a comment on my post “Some quirks of the F3 license“. The commenter’s Frontline Worker F3 colleagues do not have the option to “Add online meeting to all meetings”. Apparently the option is not visible in the Outlook web app.

Enter a new Microsoft365 detective: Teams Thorne*. Will he become as famous as SharePoint Holmes, you think?

Let’s find out! Here’s what Teams Thorne did to see if he could find out if this was user-, admin, or license-related.

1. Is it a user thing?

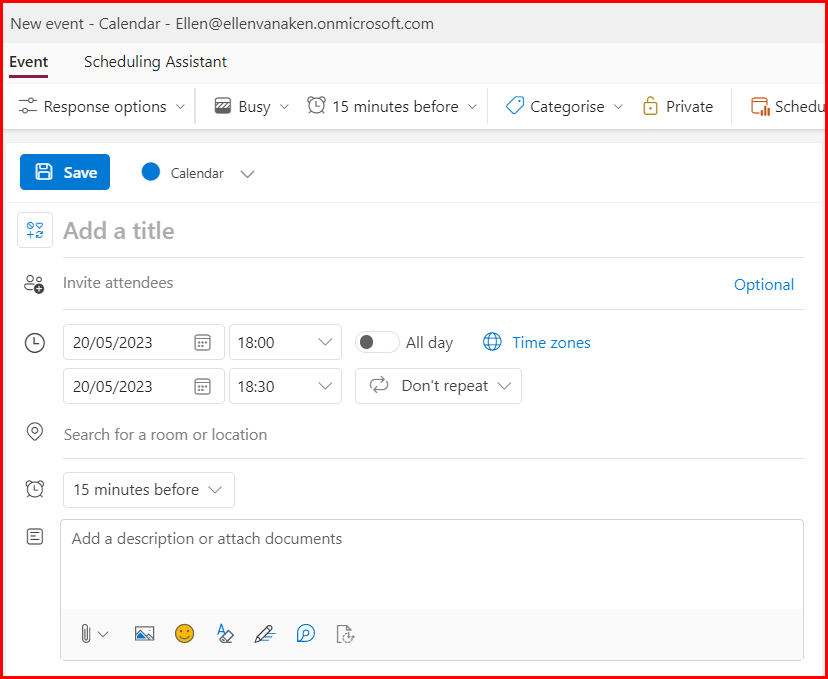
Teams Thorne has a Small Business License, which, like the F3 license, is 100% online. He opened Outlook (on the web, obviously), and first checked what the normal behaviour of his Calendar was with regards to organizing meetings. He created a new event.
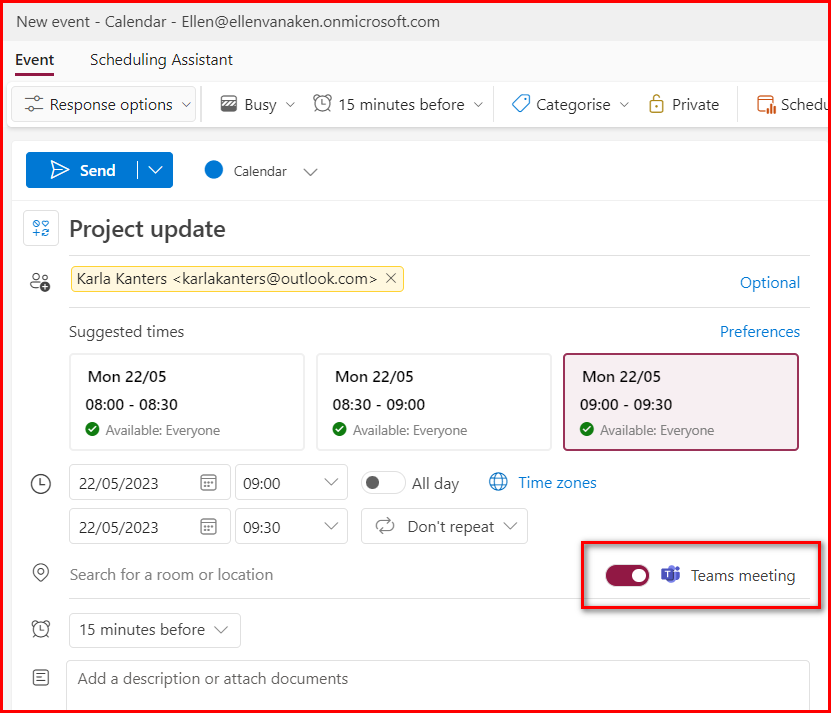
The “Teams meeting” was visible, but not checked. But as soon as he added a person to the invitees, the box got checked.

The Teams meeting checkbox is automatically checked when you add another person to your meeting.

He then looked at how things were after disabling it in his settings.
In Outlook or Calendar, click the Gear Wheel > View all Outlook settings > Calendar > Events and Invitations. The option to add an online meeting was indeed checked, so he unchecked it and waited for some time.

When this box is unchecked, you do not automatically add a Teams Meeting. You do it manually.

He went back to his Calendar, created a new event and noticed that the box did not get checked when he invited someone. But he could enable the Teams Meeting manually by clicking on the button.
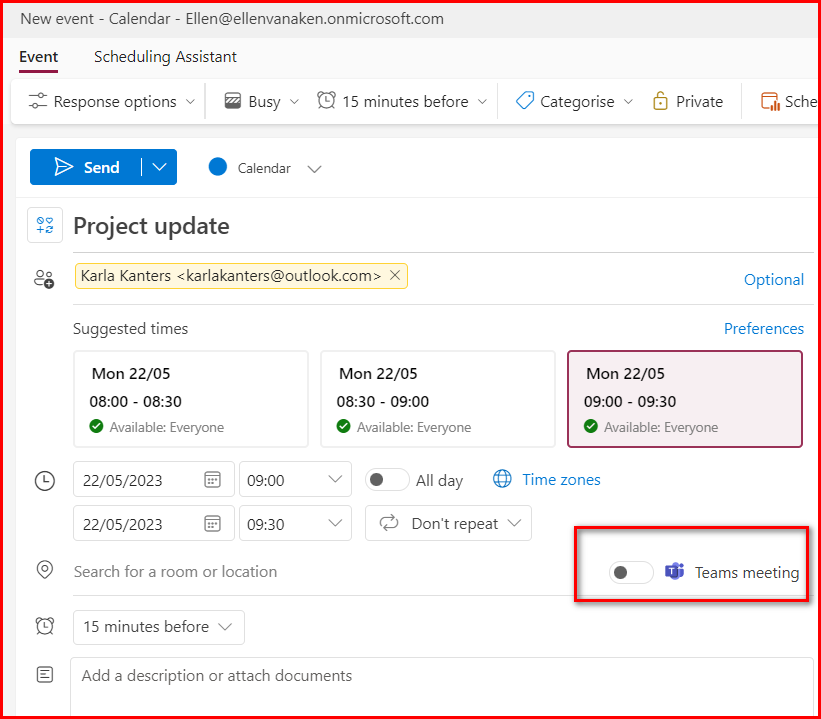
With the setting disabled, you can still add a Teams meeting, but you have to check the box yourself.

This did not match the issue described. Teams Thorne had the option to add an online meeting to all meetings, so there must be something that disables that button entirely. In any case, this did not appear to be an incorrect user setting.

2. Is it an admin thing?

The next thing to investigate was the Teams Admin Center. Perhaps there is a setting that prevents that button from loading?

Teams Thorne opened the Admin center and headed to the Teams Admin Center > Meetings. The Meeting Settings did not give any indication, but the Meeting Policies looked promising. He opened the Global (Org-wide Default) policy and looked at the options available. Hmmm, there was permission given for the Outlook Add-In, could that be the thing that made the connection between Teams and Outlook?

The Meetings > Meeting Policies menu items contains a setting for an Outlook add-in. Is that a clue?

He disabled the Outlook add-in, logged off and waited some time for the new policies to “settle”. It now looked like this:

The Outlook add-in has been disabled.

The next day, he opened his Calendar and started creating a Meeting. Hey, that Teams box was not there!

There is no “Teams Meeting” option to the right.

He went back to his Outlook settings and noticed that he could not check that box, apparently because there was no provider mentioned.

As there is no meeting provider mentioned, it is impossible to activate this setting.

So, it looks as if you need the Outlook add-in in Teams to have that option.

But…in the Global Policy, which is the Default for everyone who is not in another policy, it is enabled. I hope that organizations will not edit their Global Policy unless they have a very good reason. I can not imagine why you would want to disable adding a Teams meeting to all meetings – you do not HAVE to meet with Teams, but it is pretty convenient to have it just in case something goes wrong with your face-to-face meeting.

3. Is it a policy thing?

Teams Thorne had never tinkered with the Meeting Policies, in fact this was the first time he ever looked at them. So he concluded that the option to use the Outlook add-in is standard. But perhaps there was a special policy for Frontline Workers?

He went through the Teams Admin Center to see if there was anything else that could shed some light on whether this might be different for other groups. Hey, there was a Policy Packages menu item – could that help? He saw a number of policies, including a Frontline Worker Policy:

In the Meetings > Policy Packages there are a number of policies for different roles.

Upon clicking the Frontline Worker Policy Package, it showed a number of options:

The different policies for Frontline Workers

When he opened the Meeting Policies he noticed the following settings. The items were the same as the Global (default) policy, but a lot of things are OFF, including the Outlook add-in.

The Outlook add-in has been turned off for Frontline workers.

But when he compared it to, for instance, a Higher Education Student, or a Healthcare Clinical Worker, you see that the Outlook add-in is available for them.

In other roles, such as the Higher Education Student shown here, the Outlook add-in is enabled.

Unfortunately, it is not possible to make changes to the Policy Packages, unless you have a Teams Premium or Advanced Communications license.

Conclusion

So, there is a number of things that we have found out.

  1. Your colleagues need to have the Outlook add-in in order to be able to add a Teams meeting to a meeting they schedule.
  2. The Outlook add-in is enabled in the Global (Organization-wide default) policy and is therefore available for all employees, unless they have another policy applied to them.
  3. The standard Frontline Workers Meeting Policies have the Outlook add-in disabled, so employees with this policy package are unable to add a Teams meeting to their scheduled meetings.

So, in the organization of the person who made the comment, it is most likely that the Frontline Workers have the Microsoft Teams Frontline Workers Meeting Policy Package applied to them, or another policy without the Outlook add-in.
In theory the Global (Org-wide default) Meeting policies could also have been changed, but in that case all employees would be unable to add a Teams meeting. That was not what I understood from the comment.

But why you would want to exclude Frontline Workers from adding a Teams meeting, is totally beyond me. But that is another topic.

So, what do you think of Teams Thorne’s first case?

* About Teams Thorne:
Part of my role was solving user issues. Sometimes they are so common that I had a standard response, but sometimes I needed to do some sleuthing to understand and solve it.
As many of my readers are in a similar position, I thought I’d introduce Teams Thorne, Teams investigator, who will go through a few cases while working out loud. Teams Thorne is based on Tom Thorne, a British detective, who was created by Mark Billingham and has featured in books and a TV series.

Please note: Due to an exciting, but rather time-consuming private project (moving house) I am currently posting a bit less frequently than usual.

4 ways to manage comments on SharePoint news and pages

Whenever I published a SharePoint news post, I have always been happy when people took the trouble to read my posts at all, let alone push the 👍 button or even spent time on a reply.

But when we introduced the publishers to these feedback options a few people were hesitant. When we told them they would get an email for feedback some were relieved that they would not miss comments, some were even more hesitant because it meant “more email to take care of”.

Nonetheless, we strongly advise publishers to allow interactions for news posts. It means more two-way communication and that is a good thing.
For static pages, which are available all the time, we leave it to the publisher. It may be better to mention the responsible person or provide an email address for questions about a page on processes within the organization, for instance.

So, how can you manage comments and likes?

1. Best option: as is

When you publish a page, comments and likes are on by default. When someone likes or comments, the post’s creator (this is not necessarily the author mentioned on the page) will immediately receive an email for each interaction. (The Microsoft info says it is batched, and I remember it worked like that, but during the creation of this post all likes and comments turned into individual emails.)
This email may end up in “Other” if you have enabled the Focused Inbox.

Whether this floods you with emails, is dependent on many things: how frequently you post, the type of info you post, the size of the organization, and how interactive the audience is, for instance.

This is the email for a comment.

When do you NOT receive an email?

  • When you like or comment on posts you have created yourself
  • When you are an external publisher, i.e. you have no (email) account on the tenant where you publish
  • When you are mentioned as the author, without being the person who created the post. The person in “Created By” will receive the email instead.

2. Collect all feedback mails in one folder by using Outlook Rules

If you receive (too) many feedback mails, and/or you do not like to have all these mails scattered around your inbox, you can use Rules to collect all these in a separate folder.

Make sure you create a folder first and then set up the rules, based on ‘subject includes”

The subject lines for the various posts are

  • [Person] liked [Title of post]
  • [Person) left a comment on [Title of post]
  • [Person) replied to a comment on [Title of post]

You can also do this in PowerAutomate, of course, but Rules are easier.

My Rule to move comments to a special folder in Outlook on the web

You can also use this when you are often posting news on someone else’s behalf; you can forward comments to them using a Rule. In that case use “Forward to” as the action.

Remember to look into this folder on a regular basis, and to reply to comments where needed. This is important as the phrase “left a comment” is also used for comments on shared documents and Lists!

An alternative option for Likes

It is possible to see all Likes in the Pages library, so you could also choose to make that visible in the library, look there on a regular basis, and move the emails to the Deleted Items with a Rule. After all, you are not expected to react on Likes.
You can make it visible in the Pages library as follows:

  • Open the Site Pages library (Gear wheel > Site contents > Site Pages)
  • Click “Add column”> “Show/hide columns”
  • Select “Like count” (at the bottom) and click “Apply” top left.
    You can also do this by editing the View, but that is more work.
Add the Like Count by using Add Column

3. When appropriate: Turn off comments for one news post or page

When you click “Add > News post” from the web part, you will see the Comments option on the bottom of the page. When you toggle the switch before publishing, nobody will be able to add comments.

Toggle the switch and people will no longer be able to add comments

People can still like your post, however, and this will send an email to the creator’s mailbox.
This will also happen when there is no author mentioned or when the mentioned author is not the creator. The creator will receive the email.

There is still a “Like” button, and this will send you an email when clicked.

So, turning off comments on your posts or pages can save you some emails, but you will still receive an email for each like, so you could also use the “autodelete” option by using a Rule.

4. Not advised – turn off all notifications across SharePoint pages/news

I would not advise to do this, but for completeness’ sake I can inform you that there is an option on the SharePoint landing page to remove ALL likes and comments across SharePoint news and pages for all your SharePoint sites.
I honestly can not think of any good business case to do this (except for the Likes, see 2.), so if you have a reason to recommend it, please share in the comments!

There are two ways go reach the page with the settings:

  1. Click “Notification settings” at the bottom of every email notification for news and pages.
  2. Click the gear wheel on the SharePoint landing page, and select “Email notification settings”
Here you can turn off all news/pages notifications

You can toggle the notifications on and off.

Please note this does not stop the comments on documents. If you click “Notification settings” at the bottom of a “document comment email” you will be taken to your OneDrive notification settings, where you can turns some notifications off. But why would you?

Conclusion

If you are a news and/or page publisher, and you receive too many notification emails because your colleagues respond frequently, first congratulate yourself with being a publisher that can set people in motion! 🙂
After giving yourself this constructive feedback, check if 2 or 3 are suitable options to reduce the noise a little.

If you have any experiences with managing comments within your organization, would you please share them in the comments?

Pin, save, follow, favourite the “Microsoft365 stuff you like”

While writing my latest post I came across the different words, icons and mechanisms to store “content you like and/or want to be able to find quickly later”.

So, I wrote this overview to know what is what. You may be able to use it when writing help texts and do not want to go and look what it’s called, or it may help you to understand what a colleague means exactly. There’s quite a few words and icons used for the same functionality.

I have captured the following for every application:

  1. Terminology for the action
  2. Terminology for undoing the action
  3. Icon
  4. Where you can find it later
  5. Anything remarkable

Homepage:

  1. Add to favourites
  2. Remove from favourites
  3. ⭐ (star)
  4. Favourites tab on the M365 homepage
  5. You can add everything that appears in the list to your Favourites. This is one way to save any interesting OneDrive or SharePoint documents for later.
    The other way is on the respective Word, Excel and PowerPoint online landing pages, where you can add them to favourites. These will be shown on the Microsoft365 homepage as well.
    There was an extra option in SharePoint but that has disappeared.
On the Microsoft365 homepage, you can add all content types shown to your Favourites by clicking the … . You can find them under the Favourites tab

Delve

  1. Add to favourites (popup text when you hover over it)
  2. Remove from favourites
  3. 🏷 (label)
  4. Left-hand rail in Delve under Favourites
  5. Not sure about the exact words in 1. and 2. as I had to test this on my work account and that is in Dutch. (My own tenant only has me, and that means no suggested content)
    You can also create Favourite Boards.
Screenshot from my work account, so it is in Dutch. You can click the label below a document and you will be able to find it under “Favourites” in Delve.

Forms

  1. Add to pinned
  2. Remove from pinned
  3. 📌 (pin)
  4. Forms Homepage under Pinned
  5. This action does not influence what is on your Microsoft365 homepage and vice versa
You can Pin a form from the Forms homepage and you will then see it under the Pinned tab.

Lists

  1. Favourite this list
  2. Remove this list from favourites
  3. ⭐ (star)
  4. Lists Homepage under Favourites
  5. This action does not influence what is on your Microsoft365 homepage and vice versa
You can favourite a list from the Lists Homepage or in the list itself. This one works like SharePoint sites, right? You can see your favourites on top of the Lists homepage.

OneNote

  1. Add to pinned
  2. Remove from pinned
  3. 📌
  4. Pinned Notebooks are shown on the OneNote landing page, under the tab “Pinned”.
  5. So this is different from Word, Excel and PowerPoint while they are usually in the same range.
OneNote uses Pinning, contrary to Word, Excel and PowerPoint which use Favourite.

Outlook

  1. Pin
  2. Unpin
  3. 📌 (pin)
  4. Pinned mails are shown on top of your Inbox, see also my post “12 reasons why I 💗 Outlook on the web (owa)
  5. Only available in Outlook for the web, not in Outlook desktop
One of the reasons I love Outlook on the web! You can pin mails you want to keep to the top.

Planner

  1. Add to favourites
  2. Remove from favourites
  3. ⭐(star)
  4. Left-hand rail in Planner
  5. Plans only; you can not favourite an individual task
You can add a Plan to your favourites by clicking the star next to the name, or by clicking the … and then selecting Add to favourites. You will see your favourite Plans on the left-hand side.

SharePoint Sites:

  1. Not following
  2. Follow
  3. ⭐ (star)
  4. Follow block in left-hand rail on SharePoint homepage, world icon in the SharePoint app bar
  5. Followed sites also appear as target sites when you copy or move files from OneDrive or SharePoint
You can follow a site from the SharePoint home page or in the site itself, by clicking on the star. In this screenshot, I am NOT following the Communication site. You can find your followed sites on the top left of this page and in some other places.

SharePoint News:

  1. Save for later
  2. Remove from your saved items
  3. 🏷 (label)
  4. See my earlier post
  5. Will be shown together with favourited documents, see my earlier posts
One way to see your “Saved for later” items is on the SharePoint homepage.

Stream

  1. Add to watchlist
  2. Remove from watchlist
  3. 📄 (list)
  4. My content tab > Watchlist
  5. You can also “like” a video but there is no list of your likes – “likes” are a compliment to the creator
You can add a video to the watchlist – all added video’s can be seen under My content > Watchlist

Sway

  1. Add to pinned
  2. Remove from pinned
  3. 📌 (pin)
  4. On the Sway homepage, tab “Pinned”
You can pin a Sway and it will appear under the tab Pinned on the Sway homepage.

Teams

  1. Save this message
  2. Unsave this message
  3. 🏷 (label)
  4. Profile picture top right > “Saved”
  5. You can also Pin a message, but that means you will add the message for everyone in a specific place, so this has a different purpose.
You can Save a message for later by clicking the … on the top right of the message, You can find all saved messages by clicking on your profile pic and selecting “Saved”.

Yammer communities

  1. None, just an icon underneath the community image + description
  2. Remove from favorites
  3. 🧡 (heart)
  4. Left-hand rail under “Favorites”
  5. There is also the option to Pin a post, but that is done by the admin for everyone, so this has a different purpose.
You can “💗” a Yammer community, it will be shown in the left-hand rail.

Conclusion:

The functionality to save a specific content item for later is available in most apps. I could not find it in Whiteboard, ToDo or Power Automate, and please let me know if I have missed anything.
Next to this personal action, there is often a group action where you can make something easily available for your team. This is usually called “Pinning” 📌

The nomenclature and imagery vary widely, and I would appreciate some more consistency. Personally, I tend to prefer “Save for later”. That is very clear, even more so than “Add to favourites”. We can then use the word “Pinning” for group actions, such as pinning a document to the top of a SharePoint library, a message to the top of a Yammer groep or a chat to the right of a Teams channel.
I also notice that the location where you can find your darlings varies widely too.

So, Microsoft, is this in the roadmap for a little more streamlining? 🙂

And while we are on this topic, I would also like to be able to categorize or group things using my own words, when I have more than 10, for instance. I seem to remember you could do that with SharePoint sites in earlier SharePoint versions. (On-prem, perhaps) And I know that Forms will have Collections (check out Mike Tholfsens’s video) in the near future, but I am looking forward to be able to do that with other content.

Many roads lead to your Teams meeting

The official English saying appears to be “there is more than one way to skin a cat” but as I love cats and do not support their being skinned, I have translated the good old Dutch saying that “many roads lead to Rome”.

What I want to show is that you can start your Teams meeting in many places, to make it easy for you to join your meeting.

Let’s see if I know them all, and let me know if I have forgotten one! Or more!

1. Teams calendar

This is my regular way to access. The meeting is displayed on your calendar and when you click on it, a popup will show you the details and the link to join.

Popup with meeting details

When the meeting is about to start, or in progress, the link will be shown on the calendar, saving you a click, so you can access immediately.

As the Weekly meeting is currently in progress, the Join link is already displayed.

2. Invitation in Outlook

In this case, I have created the meeting myself so I can only show the “sent” mail, but every invitation email contains two links to the meeting. When you accept the invitation, the email is removed from your Inbox, so this is not the most frequently used option, I guess.
Unless you make it a habit NOT to respond to invitations of course…but I hope you are not that kind of person 🙂

There’s a button top left, and the link on the bottom of the email.

3. Outlook calendar

As your Teams calendar syncs with your Outlook calendar , your meeting will be displayed here too. If you “live” in Outlook, you will probably use this most often. Again, when you click the meeting, you will get a popup with the meeting details, including the link.

Regular calendar view – the Join link will show in a popup
Again, as this meeting is in progress at the moment of screenshot, the link to Join is already available.

4. MyDay in Outlook/Microsoft365 landing page

If you click on MyDay, you will see your schedule for today and more, including your meeting. If you click on this message, you will get a link to the meeting. If your meeting is already running, you will see the Join link straight on the MyDay popup.

5. Outlook notification/reminder

Do you see the notification at the top right of Outlook 15 mins before start? Click on it and you will see the meeting link in the MyDay screen.

You will see this reminder in your Outlook email and calendar

6. The Microsoft365 landing page

When your meeting is about to start, you will see it in the Recommended documents on top of the page. It disappears shortly after meeting start time. Does anyone ever use the MyDay button on the top of this page? It’s there too!

OK, so the reminder is not a document, but it has frequently saved me a late entrance! 🙂

7. My Feed webpart on SharePoint

If you have a MyFeed webpart on SharePoint, the meeting will show up there, with a link to Join. The MyFeed shows your stuff, see my earlier post.

It is a “you” thing, so this reminder will also pop up in your My Feed webpart

8. Desktop notification

When someone else starts the meeting, you will see a purple banner on the bottom right of your screen, when enabled. You can Join from here, too, or send a message that you will be a tad later. Again, this has been a life-saver when I forgot I had a meeting! 🙂

As I am the only person in my tenant, I can not share the usual screenshot (that your colleague has started the meeting) but this one from an external guest is almost the same.

The banner will show you when someone else has started the meeting.

9. From OneNote (if you have sent the invitation to OneNote)

You can send an email or invitation from Outlook to OneNote, which gives you a very nice page with all info in a nice structured way, and the link to the meeting is included as well.

OK, it is in Dutch but you will get the gist.This page in OneNote is also an excellent starting page for your meeting notes.

Have I missed anything?

Please let me know in the comments! I know there’s probably a few extra places on mobile, but I do not use that very often now that I am mostly working from home.

Send a Teams meeting invitation from a group mailbox

Teams is very much a personal tool. You see only your own calendar and if you organize a Teams meeting, the invitation is coming from you, and you can only attend as yourself.
But…sometimes you want to send the invitation from a mailbox that does not disclose your name.

There are (as far as I know) two ways to make that happen:

1. Schedule in Teams and forward meeting link

  • Schedule the meeting from your own Teams Calendar
  • Adjust meeting options if needed
  • Copy the meeting link
  • Create an invitation from the group mailbox
  • Paste the link into the invitation
  • Send to all participants
It is easy to find the meeting link: When you have created the meeting, rightclick “Click here to join the meeting” and copy.
  • 👍 Keeps your name out of the invitation
  • 👍 Teams meetings are accessible to all who have the link, so no need to worry about lack of access
  • 👍 You will be able to access the meeting as an organizer and be able to make adjustments during the meeting if needed, e.g. if you need a report of attendees or if it is important to make a “hard stop” to the meeting.
  • 👎 Some extra steps of copying and pasting the link

2. Schedule in Outlook from group mailbox

  • Schedule a meeting from Outlook
  • Add a Teams meeting
  • Send to all participants
  • IMPORTANT: Adjust meeting options NOW if needed
  • 👍 Keeps your name out of the invitation
  • 👍 Easy
  • 👎 The group mailbox is the organizer now, and that mailbox has no Teams account. This means that the meeting will have to be done without an organizer, so nobody will be able to adjust the meeting options during the meeting, end the meeting or download the attendee report.

What is best?

There are plenty of meetings where the organizer is not missed. We schedule our training webinars with the second option and that works perfectly well.

For larger or very important meetings you may want to read my post about the importance of the organizer first to see if you think there may be a need to do “organizer things” during the meeting. Perhaps you only need to adjust the meeting options beforehand.

Meeting options – they may need adjusting before the meeting.

I am often asked if you can delegate the organizer role and the answer is NO. In fact, Teams does not do delegation well, as Tony Redmond confirms in his recent useful post.

Have you come across this requirement and how are you dealing with this? Happy to learn new tricks!

Some quirks of the F3 license

Update April 2022: From January 1st, 2022 I am no longer working at an organization where I have access to both the E3 and F3 licenses. Unfortunately I can no longer update this post.

When people talk or write about Microsoft 365 Outlook, Word or Excel, they generally mean the desktop versions.

However, there are Microsoft365 subscriptions that provide only the web and mobile versions of things. With the ongoing improvements of the web apps these subscriptions are getting better and better.

Most of my therapist colleagues have the Microsoft365 F3 license, which is a good fit for people who mostly work with patients and use dedicated medical software as their main application. F3 has web and mobile apps only.

While the comparison with the Microsoft E3 license (which most secretaries and staff have) clearly display most of the limitations of the F3, (albeit in the small print) there’s a few unmentioned “surprises” so let me list all that we have found so far, while providing support to our F3 collagues.

1. No desktop apps

This is the most obvious limitation. I think Word and Outlook for the web are both pretty good and getting better all the time, but some advanced functions are only available in the desktop apps, e.g. creation of scientific literature citations, or creation of a book index in Word.
An overview of the differences:

2. Storage for Outlook and OneDrive: 2 GB

Yes, it is mentioned quite clearly (also in our own support materials) but we regularly get questions from people who have almost reached the limit. All we can do is provide them with help to clean up their Outlook and OneDrive.

This is also the reason why I was not happy with the recent change to store Teams meeting recordings to OneDrive.

3. You can not upload a video to Stream (Classic)

Update November 2022: With the move to Stream (on SharePoint) I expect this issue to disappear, as created videos will be stored on OneDrive. But with only 2 GB of storage space, it means F3 users will have to be very careful and move videos to SharePoint where possible.

Just to be clear: F3 people can consume videos from Stream but not create them. It is mentioned in the comparison. I do not really get this. Are F3 users not expected to share any videos? Not even of training materials or a team get-together? We have a few colleagues who like to do vlogs for their colleagues – no Stream for them. 😢

With the E3 and other licenses, there’s an upload option top right. No such thing for the F3.

4. Recorded Teams meetings go nowhere

We made the change from storage in Stream to OneDrive and SharePoint early, because we knew that F3-users can not upload anything to Stream. If an F3 recorded a meeting, they got an error message.
So we thought: “Well, OneDrive may not be optimal, but at least they will be able to store their recording in a good place. So let’s make the change, make them aware and suggest to move any recordings to SharePoint at their earliest convenience.”

The other day I recorded something with my F3 test account, and I was totally surprised to see that the recording did not go anywhere. It is in the meeting chat, with a message that it can be downloaded for 20 days.
The good news is that the recording can be saved. The bad news is that this is not as expected, and that people will need to take action to store it.

You need to download a recorded meeting.

5. You can not create a Live Event

This is not a major issue, as organizing a large online event will generally be done by a few selected roles. An executive secretary, our Convention Bureau, communications etc.
An F3 colleague can produce and present, however, as described in this post.

This has nothing to do with the difference between web or desktop app – everyone in our organization has the Teams desktop app.

6. You do not have the Delve app

This is not mentioned anywhere in the comparison, so this was also a surprise when we found this. It is not too much of a limitation, as you can get there via your Office profile.

7. Agenda sharing issues with E3-colleagues

If an F3 colleague shares his or her agenda with an E3-licensed colleague, e.g. a group secretary, the secretary can only edit the agenda when using the Outlook web app.
This may have to do with the fact that there is no “desktop equivalent” in the F3-agenda. It is annoying though, as our secretaries generally prefer to work with Outlook desktop. We are trying to convince them that the Outlook web app is a joy to use, but so far most of them stick to desktop. 😢

Do you know any more quirks?

I have deliberately not mentioned a number in the title. Please let me know in the comments if you know something else, so we can create a shared resource!

This is a great opportunity to use one of the more than gorgeous letters of Simon Koay’s Superbet. F = Flash!

It’s a Poll! It’s an email! It’s a Form!

Forms may not be as hip as Teams at the moment, but it sure is a cool tool, sometimes even cooler than I thought!

Something relatively new is the option to add a Poll in an email. It is a nice option to quickly add a Choice question to your message. There is some support information out there but let me show you the full picture.

1. Create and send

When you open a new email and click on the … on the bottom of the mail (in the toolbar) you will see an option called “Poll”.

Click on the bottom of the new mail for the option to insert a poll

Click that and you will get a sidepane with a Choice question.

Enter your question and answer

Enter question and response options and click “Insert Poll into email”.

The poll will be inserted in the mail; the title of your question will be the subject line of your email (you can change that) and in the email body and you are added in the cc. If you change the name of the poll before you send it updates in both places! 💪

This is the email; you will get title and the link to the poll, but you can add explanatory text.

You can now type the rest of your mail and send it to your audience.

TIP: If you want to have that poll option always available in your toolbar just click the gear wheel top right > View all Outlook settings > Email > Customise actions and then scroll down to Toolbar. Check the Poll box and Save.

How to make the Poll-icon always visible at the bottom of your mails

2. Receive

So what happens when you receive an email?
The question will be displayed on top of the mail, with the options visible. This makes it easy to respond, but if you have many options in your answer, you will need to scroll to see the rest of the email.

You can see all options and vote immediately

When you have cast your vote, you will immediately see the result. You do not have to reply as your vote has been saved.

You can see if you have picked a day that others selected as well

If you happen to click the “View/vote in browser” link you will be taken to the Form in its regular format.

3. View results in email

As an owner, you can view the results from that mail. That’s why you are in the CC!

4. View results in Forms

The sender of the email is the owner of the Form, and when they go to their Forms page, they will see the Form with a poll-icon to distinguish it from a regular Form.

You can see this is an in-email poll by the poll icon

If you open it, you will see a message that you can not edit the poll.

Apparently this is called a Quick Poll and it is read-only

Limitations

  • You can only add one question
  • You can only add a Choice-type question
  • You can not edit the Form on your Forms page
  • Everyone sees the results immediately – that may be good or bad, just be aware.
  • People may forget to scroll down to see the rest of the mail 😁
  • According to the support information, this should not work well with people outside your organization, but it worked perfectly well between my Microsoft365 and private Outlook or Gmail accounts.

I can imagine this could be a good option for a quick question, without having to go and create a complete Form with all the trimmings.

Most of all, I like the integration of Forms and Outlook. It is smooth, clever and elegant.

It is also available in the Outlook desktop app but I am no fan of that.

Have you used it yet? And have you encountered a scenario where it did not work with “externals”? Let me know!

Where have all the features gone?

We always think very carefully if and how we communicate changes to our Microsoft365 environment.
Generally, changes that affect all users, and may lead to questions or confusion, will be posted on the intranet. We do this for about 2 or 3 changes a year. Think about “the new Outlook on the web” last summer, and the new design of the SharePoint homepage earlier this year.
Changes with a lesser impact are communicated through our dedicated Yammer group for people who take an interest, and during webinars.
Additionally we regularly revise our training and webinar materials.

So, we were a tad worried when we found that some new functionality that had been in our tenant, and had been communicated, suddenly disappeared. In one case we found out that the functionality had been retracted, but we have no clue about the others.

Perhaps one of my readers can help?

1. The SharePoint start page

A few months ago we published an article on the intranet that there would be a new SharePoint start page. The column on the left hand side would be removed and some of the info there would move to below the site cards. We prepared the communication and an explanatory screenshot.
When we could finally confirm that also our non-targeted release users had it, we published the article.

Around March and the start of the Corona-crisis, I noticed that my SharePoint start page had reverted back to the old setup, both at work and in my own tenant. I checked the Roadmap, the tenant Message Center, the internet, but nothing came up.

Only half May I found out that I had missed this article, which has a small paragraph on this topic.

Gone-SPstartpage
As the article above is quite long, this is the message.

Well, thanks for that. And I could not find the #192001 in my Message center, nor in that from my work tenant. 😦

2. Save documents for later in SharePoint

I was already aware of the Save for Later options in SharePoint News, but I was happily surprised to find that this function would also be available for regular documents in SharePoint sites. I saw it a few months ago, immediately saved a few documents and told our Yammer group.

I still have them saved on my SharePoint page. But the functionality is gone in both my private and my work tenant!

I have not imagined it, as this SharePoint Roadmap Pitstop from November 2019 shows. It points to a Roadmap #49095 which mentions the functionality for OneDrive…with a launch date of Q4, 2020.

What has happened in the mean time? What retraction or delay announcement have I missed?

BTW, this blog shows the Saved for later files on the new SharePoint home page.

3. Files tab in Outlook

Some time ago, my colleague and I noticed a paperclip icon in the bottom left of our Outlook-on-the-web app.

The paperclip

When clicked, it would give you a page with all attachments in your mailbox. Very convenient for cleaning up! However, it has not been seen for several months.

Once again, I have not imagined it. I wrote about it in this blog about my love for Outlook-on-the-web.

Update July 8, 2020:

The files tab in Outlook is back! I just received a comment from Eric (see below) and I immediately checked. I wish I could sort them on file size, but it is already a big plus that I can see how many files live in my Outlook!

Does anyone know?

You know I like to play the detective, but I could not find the answers this time 😉

Title inspired by 1955’s song “Where have all the flowers gone” by Pete Seeger.

Teams meetings for non-business users – invitations

Teamsclient-headerTeams may have originally been intended as a business-to-business meeting and collaboration tool, it is now, in COVID-19 times, used heavily for all kinds of gatherings. The education sector is using it big time, my own organization is using it temporarily as a group therapy session tool, and I use it to meet with my fellow “citizen activists” who want to keep our lovely home town a great place to live in for real people.

So, right now Teams is being used by many non-business people, and I have had a lot of questions about “how it works” for non-business external users, as in: “what do they get and what do they have to do in order to participate?”

The fun part when you use Teams for “consumers’ is the variety of systems that people use – devices, browsers, email clients. So, I tried a few things, starting from my own Office365/Microsoft365 tenant.

I created a meeting from Outlook Online, as described earlier.

  • It does not show attendees
  • You can not forward the invitation
  • Externals need to wait in the lobby
  • Externals are an attendee, not a presenter

I sent this to various online emailclients: Outlook.com, Gmail.com, Yahoo.com

I opened the mailboxes with various browsers on laptop and the Outlook one on Iphone and Ipad.

I looked at the invitation and accepted the meeting (where possible).

What does the invitation look like?

Teamsclient-OutlookChrome
Laptop/Outlook.com mail. This invitation looks the same in Edge, Chrome, Firefox and Internet Explorer. The yellow bar mentions that the invitation can not be forwarded. (in Dutch)

Teamsclient-YahooFirefox
Laptop/Yahoo mail. Invitation looks the same in Edge, Chrome and Firefox. Internet Explorer shows a basic version. There is no Accept/Tentative/Decline option and no mention of the non-forwarding. And what is that silly logo next to my name?

Teamsclientgmailchrome
Laptop/Gmail. Invitation looks the same in Edge, Chrome, Firefox and Internet Explorer. There is an option to respond, but no mention about the non-forwarding. Although the time is technically correct, it is not the “natural” Dutch time and I could not find a way to correct it.

Teamsclient-outlookapple
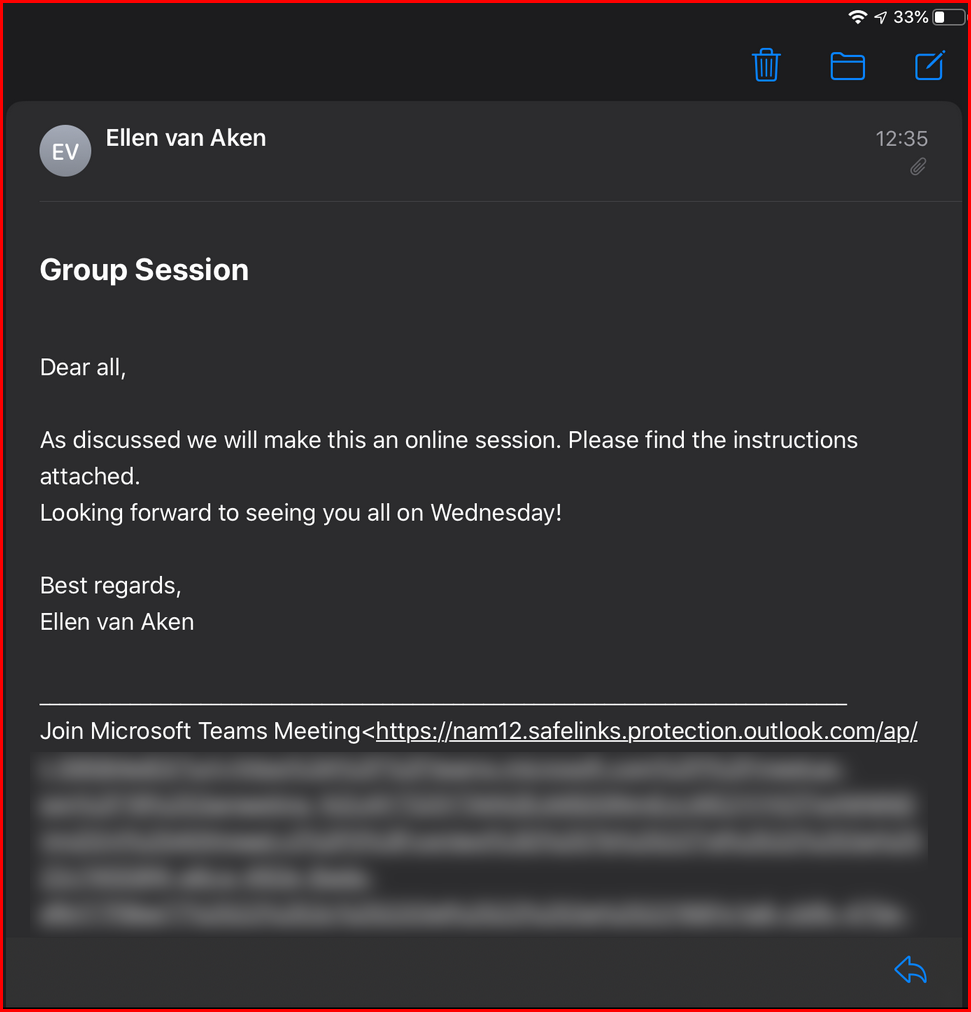
iOS: Outlook.com mail via Apple Mail app. Yikes, this is all you get. The top says: this message is plain text, download the full message. If you do that, you get this:

Teamsclient-outlookappleexplanded1

Teamsclient-outlookappleexpanded2
Well, double Yikes. While iOS is usually so cool and user-friendly, this is awful. You have to download the message to make sense of it, and then you get a ton of ugly links and then at the bottom your instructions and the .ics file. No mention of the non-forwarding.

Teamsclient-outlookandroid
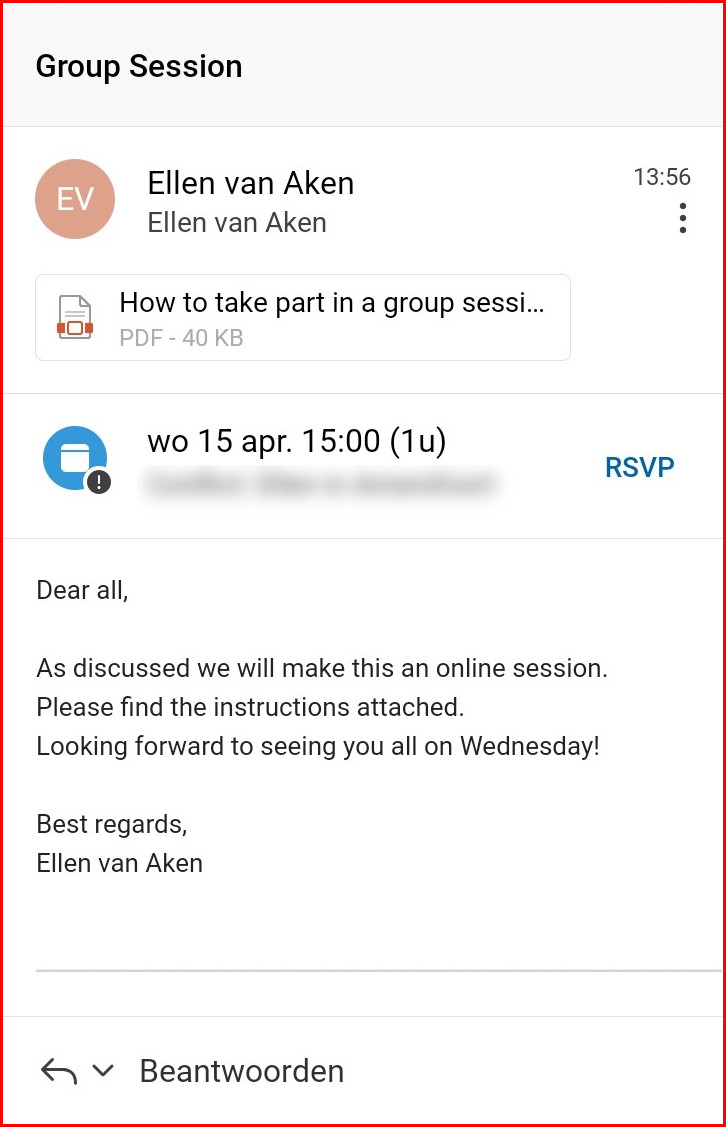
Android. Microsoft365 account, Outlook app. Response options but no mention of the non-forwarding.

What have I found so far?

  • Do not expect a response message if you are inviting external non-business users. I did not receive any responses except from the Microsoft365 user, even though I did accept the meeting on Gmail and Outlook.com.
  • Invitations to Gmail often go into the Spam box, especially when I used the “hide meeting attendees” option. You may want to check with your externals that they have seen the invitation.
  • Check if the meeting is on the right date and time on the receiver’s end. If people have their mailbox on a different timezone, they may want to adjust it.
    Or in case of Gmail, do they realize that the time is in UTC and what UTC means? 
  • Tell people that the invitation may move out of their inbox after accepting or declining it and that they can find it in their Deleted Items if they want to keep it. 
  • Sending an invitation does not mean that the date and time are added to the Calendar option of the email client automatically. In some case you need to download the .ics file (which not everybody may understand) or specify to the email client that invitations should always be added to your calendar.
  • “Do not forward” appears to work only within Microsoft email – the option to forward is greyed out in Outlook, but the emails sent to Yahoo and Gmail could be forwarded and the recipient could enter the meeting. ☹
  • Please note that I have an up-to-date Windows 10 laptop with current versions of browsers – be aware that non-business users may have different setups and different versions!

Do not assume!

In other words, do not assume that everything will work in the same way as with your external business contacts. Your “consumer” audience has a much larger variety in devices, mail clients, updates and browsers than your business contacts (who in many cases use Outlook, if not the full Microsoft 365suite). Your “consumer” audience may also be less exposed to formal meetings and be not as tech savvy – or be more savvy with other systems than Microsoft365.

Next time, I will discuss what happens when you click on the meeting link

5 steps to clean up your Outlook on-the-web mailbox

CleanOutlookheader

This post has been revised and updated May 1, 2022.

Some time ago we introduced the Microsoft365 F3-license into our organization. I work in a health care organization and the majority of our staff is providing care and counseling to our clients and patients. They work mostly with the official patient/client data application. They do not use Office365 heavily.

The F3-license differs in some aspects from the E3 or E5 license used in larger and more office-based organizations, for instance:

  • No desktop apps – it is all online
  • 2 GB Outlook mailbox instead of 100 GB
  • 2 GB OneDrive instead of 1 TB
  • No Delve app visible (on the Office365 landing page) or available (on mobile devices) – but I have a workaround

For more differences, please read my post “Some quirks of the F3 license“.

What happens when the mailbox reaches 2 GB?

When a F3-user reaches 1,98 GB of storage space, they will get a warning message. 1,98 GB is default, but the warning limit can be lowered by the Exchange admin if you want to give people more breathing space.
People will also no longer be able to send messages at that point. So it is important to keep well away from 1,98 GB.

When we made the change, about 10% of users had more than 2 GB in their Outlook on-the-web mailbox, so we sent them a message about what was going to happen and gave them suggestions for cleaning up.

What should you do to reduce storage?

I have noticed that there is a vast amount of support for Outlook on the internet but it is mainly for the desktop app and trust me, there is a BIG difference between the Outlook desktop and Outlook on-the-web.
BTW, I just found Nate Chamberlain’s tips to clean up your Outlook desktop!

So, here’s what we advise our colleagues. Feel free to re-use and embellish!

1. Empty the Deleted Items folder

Apparently there is no tenant-wide option for Outlook-on-the-web to empty the the Deleted Items folder when you log out. (It is possible for the desktop app)
So, it is possible that you have years of Deleted Items in that folder, eating up space! If you know your Deleted Items are there to be deleted, the fastest way is this:

  • Right-click on the name Deleted Items in the left-hand menu
  • Click “Empty Folder”
CleanOutlook-deleteditems
You do not even have to open your Deleted Items folder in order to empty it!

If you have > 500 messages in there, or if you want to check what you are deleting, it may be best to do this in batches:

  • Open the Deleted Items folder
  • Select a number of messages
  • Click “Delete” from the top bar
  • Repeat when the selected items have been deleted
CleanOutlook-selecteditems
Open folder, select items and click Delete is a more gentle way to clean up.

The deleted messages will be stored in a new place. You will see this in your Deleted Items folder, called “Recover items deleted from this folder”.
The “Recoverable Items” works like the SharePoint or OneDrive Recycle bin. You can restore messages back to their original location within 14 days (default) or longer (tenant setting) after deletion.
Items in the “Recoverable items” do not consume storage space.

CleanOutlook-deleteditemsrecoverable
I only recently discovered this nifty option to recover deleted emails! It is in the Deleted Items folder.
CleanOutlook-recoverable
You can restore deleted items back to their original location, just like OneDrive.

Select an item, click “Restore” and your message will be back to the original folder, i.e. Inbox or Sent Items or what not.

Now that your Deleted Items is empty, let’s go to the next step.

2. Check storage space

Which folders consume most storage space?

  • Click the Gear Wheel top right and then “View all Outlook settings”
  •  Go to “General”, then click “Storage” and you will see how much you are using, both graphical and numeric. Nice!
Here you can see how much you keep in each folder, sorted by size.

You can quickly delete from here, by clicking the arrow next to Delete, and selecting an interval. I expect that in most cases you will want to check the contents first, however. (Although I once sat with a user who discarded the “12 months and older” from her Inbox without blinking an eye, as she had switched jobs a few months before and did not need the content from her old job.)

You can remove mails based on their age on this page.

3. Clean up your largest folders

Deleted Items, Inbox and Sent Items are generally the main storage space hoarders. Depending on your organization’s settings, Junk Mail can be a biggie, too.
So let’s start there with two sorting exercises:

a. Delete largest items

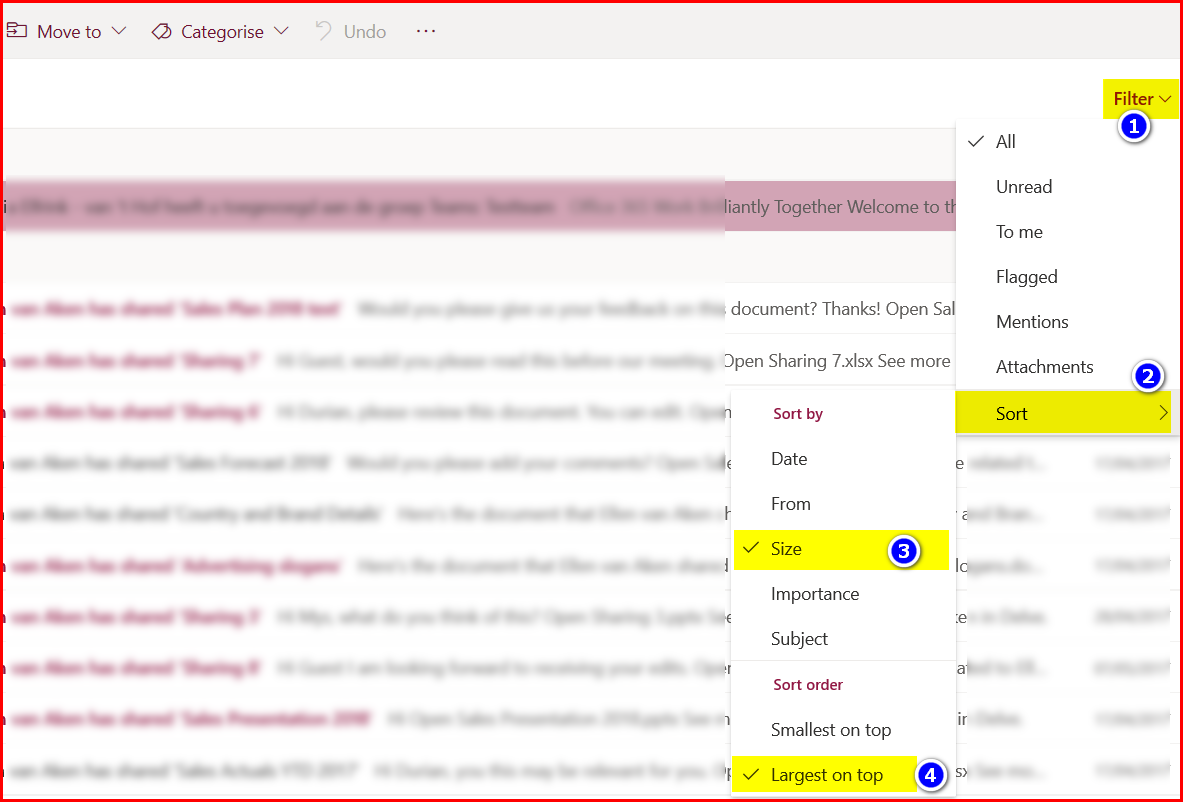
In your Inbox, click Filter (top left), then Sort on Size, largest on top.
Check if you still need these messages. If they contain large attachments, save the attachments to OneDrive. You can move them to SharePoint later, if needed.
If the email text is important, you can save it as a PDF and store it on OneDrive or SharePoint.
Delete the message once you have safeguarded the content in another place. Or just delete it if it is no longer of value.

CleanOutlook-filterlargest
How to sort the contents of a mailbox folder on size.

b. Delete oldest items

In your Inbox, click Filter (top left), then Sort on Date, oldest on top.

Do you really still need the oldest messages? If yes, turn them into a PDF and store in OneDrive or SharePoint before deleting.

c. Repeat for other folders

Repeat steps a. and b. for Sent Items and any other folders that contain a lot of data.

4. Repeat steps 1, 2 and 3 if needed.

I have helped a lot of colleagues through this process and these steps were usually sufficient to get below the 1,98 GB threshold. If not, you will have to redo it and be a little more strict.

5. Auto-empty the Deleted Items folder.

Now that you have a cleaner mailbox, you will want to keep it that way! You can empty your Deleted Items automatically after sign-out as follows:

  • Click the Gear Wheel top right and then “View all Outlook settings”
  •  In Email, go to Message Handling, check the first box and click Save.
CleanOutlook-emptydeleteditems
How to make sure your Deleted Items is emptied on a regular basis.

It was fun writing this post – my own mailbox is smaller now as well 🙂