SharePoint site naming conventions – my experience

The other day, Gregory Zelfond’s SharePoint Maven newsletter featured best practices for naming conventions for SharePoint sites.
In the three organizations I worked for, I have used very different naming conventions. So let me share them to illustrate Greg’s points.

My first intranet

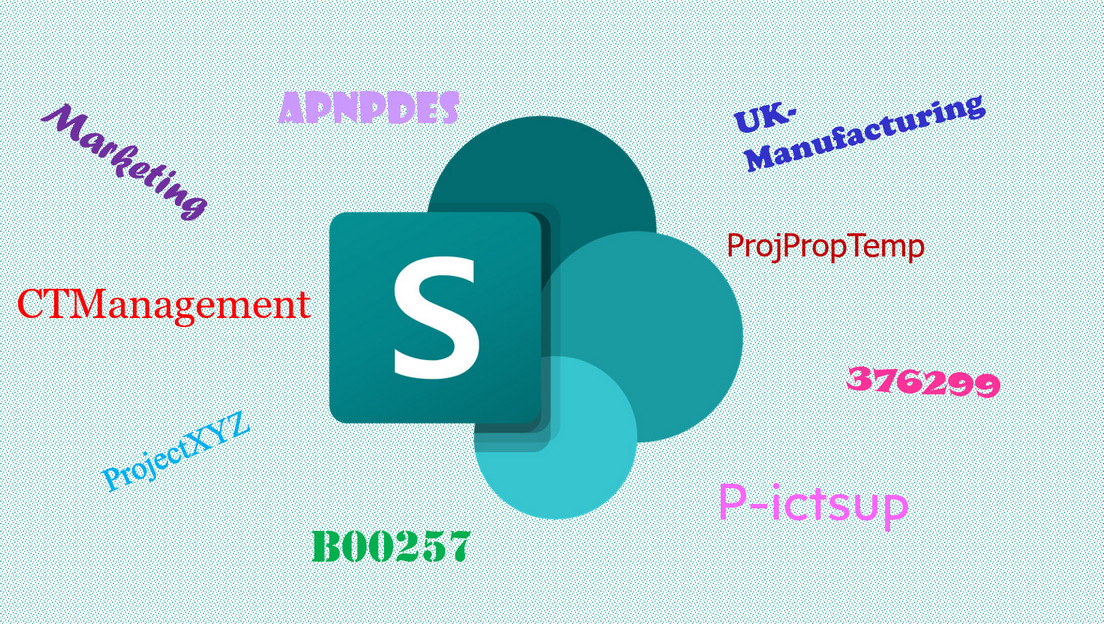
We had central creation of sites, but not really a naming convention. We checked if there was already a site with that name, tried to keep names short, avoided spaces and special characters, and tried to bring some order in the chaos by adding business or brand abbreviations into the name, such as AP (AmbiPur), CT (Coffee & Tea) and some others.
It all worked, which is strange for such a large organization (120.000 employees at one time), but then SharePoint was not yet widely used, so we had a few hundred sites at most.

Good practice: central site creation; short, no spaces or special characters; somewhat meaningful for users
Bad practice: no formal naming convention (but best efforts)

My second intranet

This was an excellent example of bad practices before and after migration 😁
(Read more at: my second SharePoint intranet)

When I arrived at the scene, every business or corporate department had their own site collection. (Yes boys and girls, site collections were still all the rage then!)
Ownership of the site collections (including site collection administration permissions!) was with the business, and ICT was site collection admin for general support. And every site owner could create subsites. 😱
As most business owners did not really know about URL character limitations, we also experienced that documents could not be opened due to a too long URL, caused by endless “nesting” of subsites and sometimes very long site names.
Every business had a number of sub businesses, all in that same site collection. As soon as someone needed a site for Marketing, the business owner created one called Marketing under their own sub business, or created a subsite under Marketing if there was already a site with that name. So we ended up with several layers deep and various sites called Marketing (or even “…/Marketing/Marketing/…”) within one site collection.
You can imagine this was a bit messy. 😁

It was fun to support.
“Ellen, could you help me with the Marketing site please?”
“Which Marketing site?”
“Ours”
“Can you send me the link please, as we have four sites called Marketing in different parts of the site collection.”
“Oh really?”

Good practice: meaningful to users
Bad practice: no central site creation, no formal naming convention, spaces turning into “%20” in URLs, long URLs

After migration to SharePoint Online, every subsite became a stand-alone site, as recommended. We finally had central site creation and adopted a naming convention. This was simple: a number, starting with 00001 for the first site being migrated and then onwards. There was no other logic, nothing like “we reserve 00001 until 09999 for this business” so the order was the order of migration, then creation, which is completely irrelevant.
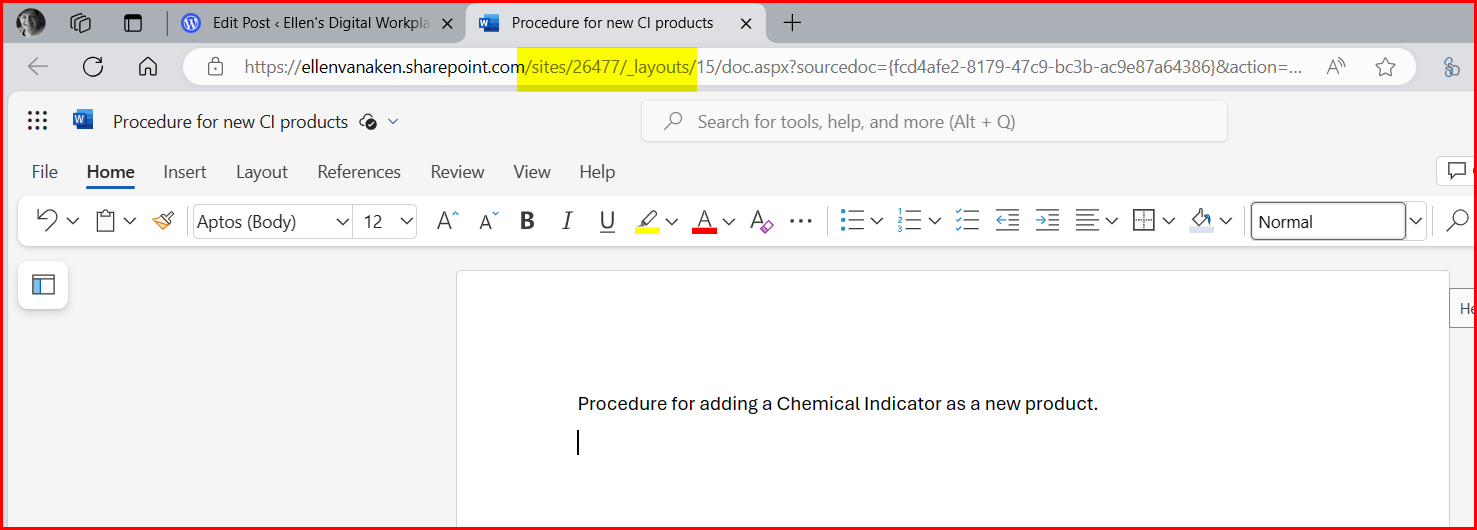
We changed the site name after creation to something more meaningful, but that number was still in the URL, providing no information scent whatsoever. I think it was rather cruel to users.

A site with a numeric URL

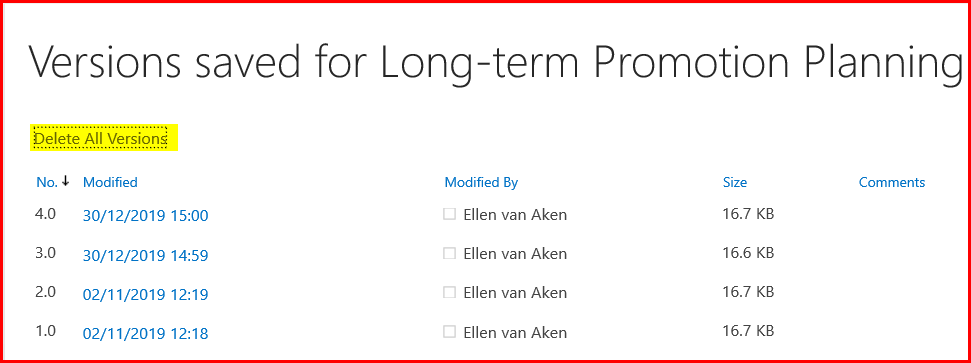
On site pages (see above) the number is not so bad, as the site name is shown in various places. Also across SharePoint you will see the site name, not the site URL.

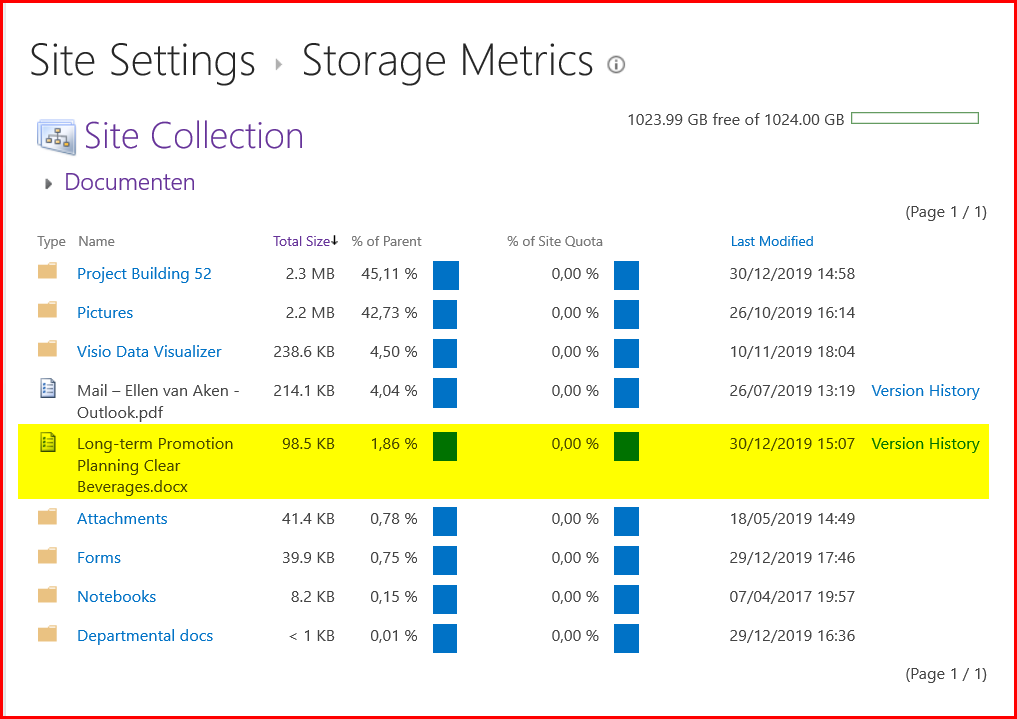
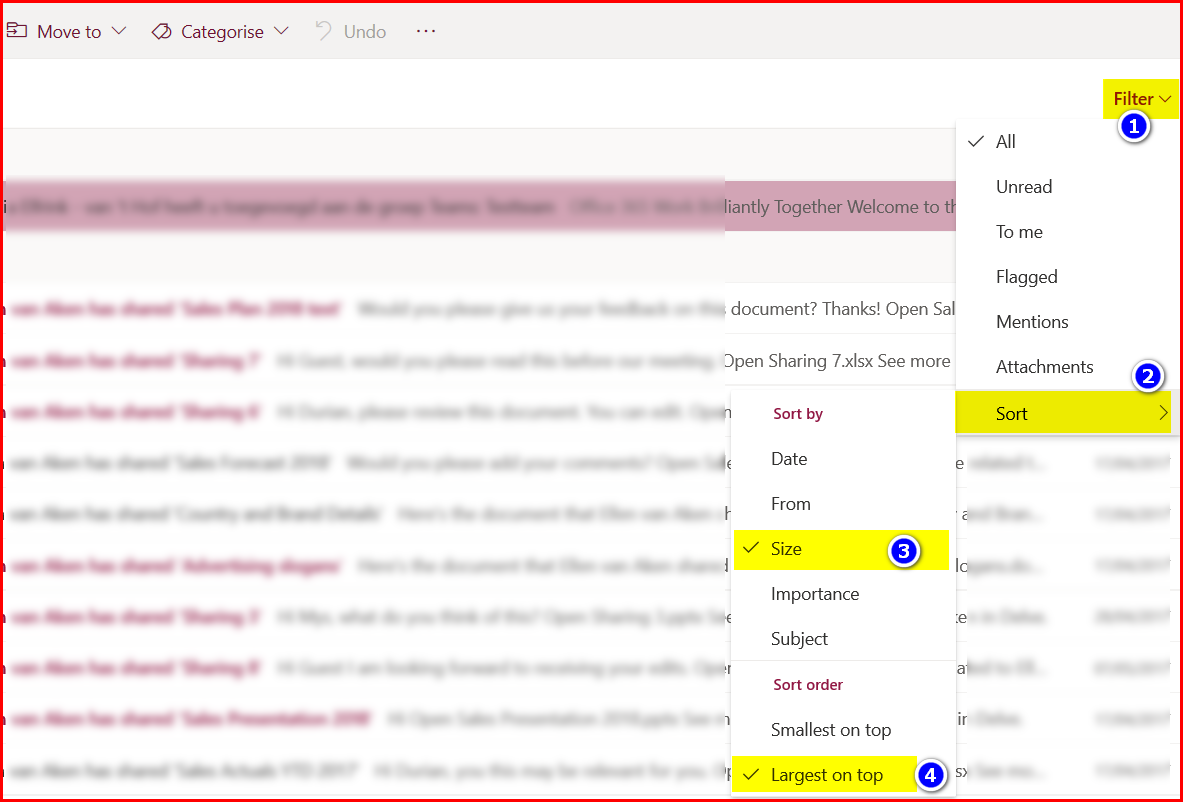
But in documents you only have the number to remind you which site you are in, as seen in the screenshot below.

A document in a site with a numeric URL

Good practice: central site creation, formal naming convention
Bad practice: not meaningful to users

My third intranet

My last employer had central site creation and a solid naming convention when I arrived, and we never felt the need to change:

  • a letter to mark the purpose of the site, determining the template, e.g. a for archive, p for project. We later added g for groups (Teams-sites) and i for intranet sites.
  • a dash – to separate the letter from the rest
  • 3 letters to mark the part of the organization
  • 3 letters as abbreviation for the required name

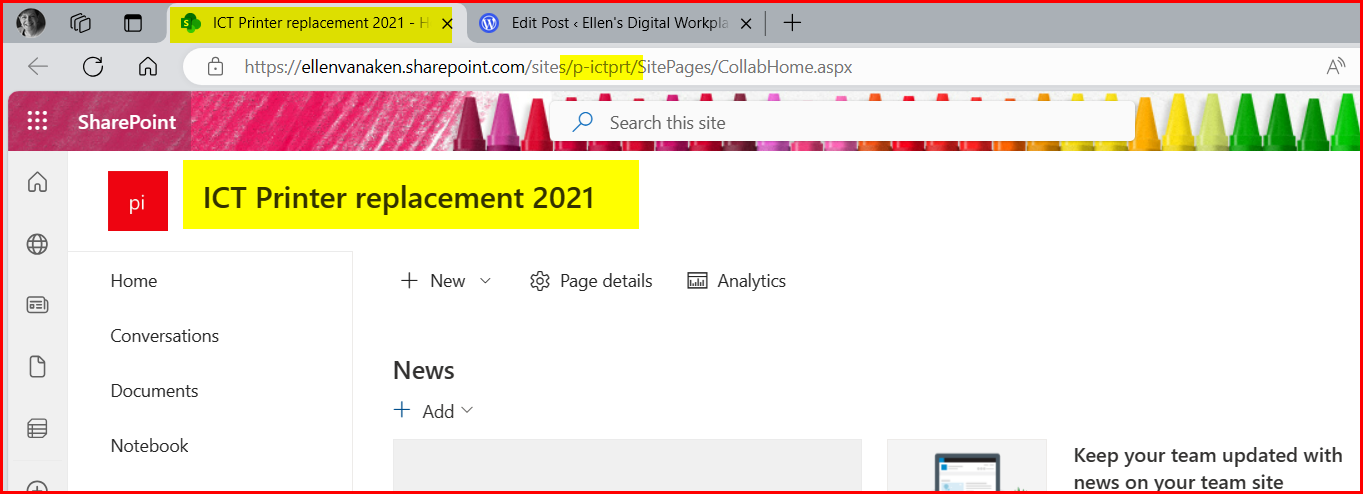
So, that could be “p-ictprt” for a printer replacement project from ICT, or “c-fehsec” for a collaborative site for secretaries of the FEH unit.
After creation, we changed the site name to a more intuitive name.
It was short, it had an information scent, and it allowed us to filter and sort for housekeeping purposes. (In the Active Sites list in the SharePoint admin center)

The homepage of a site with a (somewhat) meaningful URL

Good practice: central site creation, formal naming convention, short, no spaces or special characters, meaningful for users, useful for maintenance and support
Bad practice: none (well, perhaps the dash in the URL but I think that added meaning and it is still short)

Remarks:

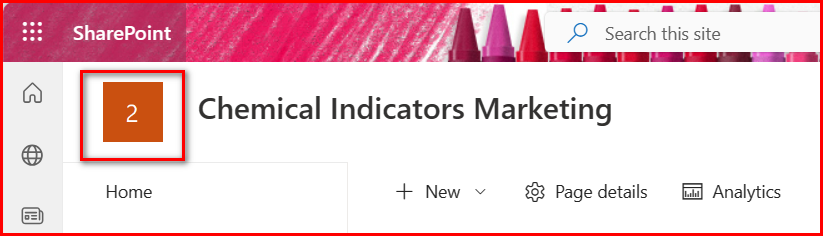
  1. Please note that the site’s icon displays the characters from the original URL. It will not change upon changing the site name. You may need to change the site icon to get rid of that “2” in the screenshot below.
The first character(s) of the original URL will be displayed

2. You may also want to think about a naming convention for Teams, see this article from Microsoft: https://learn.microsoft.com/en-us/microsoft-365/community/microsoft-teams-naming-importance
In my third organization, we used the same convention as for SharePoint sites but then with g as the first letter, and we changed the Teams name after creation into something meaningful.

3. Please sign up for SharePoint Maven’s Newsletter if you have not done so yet. Gregory knows a LOT and explains things very well.

Which naming conventions have you used?

Please let me know in the comments!

SharePoint Holmes and the Concealed Classic sites

Today I have a mysterious SharePoint issue myself. Fortunately, I know where to reach SharePoint Holmes so I can ask for help! 😉

< takes cloak, puts on detective cap >

The case

Over the years I have created lots of new sites in my tenant, in order to learn, to test stuff and to make screenshots for my posts. As my list of sites was pretty long, and as I am no longer using most of those sites, I decided to do some spring cleaning.

What better place to start than the SharePoint Admin center? So there I headed, to the list of Active sites. This includes the root site, an App Catalog, a site called “Group for answers in Viva Engage (I never created that myself!) and my External site, which should no longer exist but still is around. (More about that in another blog)

I checked each site and deleted it when possible. Oh, the joy of being alone in your tenant and not having to ask if an unused site can go! 😁 (Mind you, at other times it is not very practical to be the only user in your tenant.) I ended up with this manageable list of 13 sites:

My Active sites. The ones that are sort of “system-related” are highlighted.

To check all sites had really gone, I looked at my SharePoint landing page, under Followed sites.
I noticed a few sites that were not in my list of Active Sites, such as 3 varieties of “Team site”. They are all highlighted in the screenshot. What is happening here?

The investigation

I clicked on each of the highlighted sites to see what was the matter.

Sites I follow. The highlighted ones do not appear in my list of Active sites.

“Espana-Management Only” and the “Team site” on the same row appeared to have been deleted. Deletion of a site apparently does not delete the Follow, which is unpleasant.
I unfollowed those sites to keep my list clean.

This is what you see when you click a Followed site that has been deleted.

I opened the other sites. Hey, this was interesting.
“Quick Links”, “Project site” and “Sales Reporting” looked like subsites, judging from their URL. According to the information link in the SharePoint admin Active site list subsites are not listed in the Active sites, as are some other system sites. OK, that is a little annoying, but as we are not supposed to use subsites anymore, it also makes sense.

That leaves a few other sites.
I had already noticed that the 3 subsites are Classic sites. The “Team Site” and “ellenvanaken-teamsite” are also Classic sites.
But they are not in my list of Active sites!

I went back to the SharePoint Admin Center and filtered on “Classic sites”. Nope, they were not in the overview.

Filtering on “Classic sites” showed only three “system” sites

I was not exactly happy about this, as I want to be able to know which sites are in my tenant. Which other sites was I missing?

I checked the “Recent” in my SharePoint Landing page and noticed another Classic site that was not in my list – “Drinks business”. The URL did not look as if this was a subsite.

My list of recently visited sites contained another Classic site not in the list

I traced back all the subsites except the “Drinks business” to their parent sites: “Team Site” and “ellenvanaken-teamsite”. But those two parent sites were not in the list of Active sites!
I looked again at my list of Classic sites in the Active sites. There are two sites that start with “ellenvanaken” so might that be a clue that those were the original sites created when I set up my tenant? And that all sites were created from there?

I clicked on the link of the root site but got an error message.

My root site has an error, it does not have a homepage

But when I added “_layouts/15/viewlsts.aspx?view=15” to the root I could access the list of subsites. BINGO!

The solution

All my mysterious subsites were there.

The mysterious sites are subsites of the root site.

I had never realized that these were all subsites and therefore not displayed in the list of Active sites. In the early days (my tenant is from 2011, well before Modern SharePoint) I created each subsite from the ellenvanaken-teamsite. Later I created sites from the SharePoint landing page, which creates sites on the top level.

Well, I am not exactly happy with these messy results but at least I understand and know where all my sites are. I need to think about streamlining this clutter!

Conclusion

  1. If you have an older tenant you may still have Classic subsites hanging around, which are not visible in your list of Active sites in the SharePoint admin center. This is a potential risk, as they may live on forever, may contain outdated or incorrect content or people may still be working in an outdated environment. Although Classic sites still work, they are a tad cumbersome to work with, once you have become accustomed to current SharePoint!
    So you (or your Microsoft365 admin) may want to take a look at your root site and see what you can find underneath.
  2. You may want to inform your colleagues that deleted sites will still be shown in their Followed sites. A periodic reminder to go through all Followed sites (and to unfavourite all that have been deleted or they are no longer interested in) may help them to keep their lists manageable.

About SharePoint Holmes:
Part of my role was solving user issues. Sometimes they are so common that I had a standard response, but sometimes I needed to do some sleuthing to understand and solve it.
As many of my readers are in a similar position, I thought I’d introduce SharePoint Holmes, SharePoint investigator, who will go through a few cases while working out loud.

Please note: Due to an exciting, but rather time-consuming private project I am currently posting a bit less frequently than normally.

5 Tips to keep your OneDrive lean

Microsoft365 may be introducing all kinds of shiny new functionality, your good old OneDrive is as important as ever. More and more information is being stored on OneDrive automatically and by default, so it may grow even without you consciously adding and uploading Word, Excel and PowerPoint files.

This could be an issue especially for users with an F3-license as they have only 2 GB of storage space at their disposal. Their OneDrive may get full quickly and that is rather a nuisance.

But also the 1 or 5 TB of E-licensed users will fill quickly if they have a long career in this organization and never a clean-up moment.

So, the following may be of interest for all:

1. Understand what is “private” and what is “shared” (and what is in between)

Although information on your organization’s OneDrive is never truly private, we consider files and documents that are only for you, private. This can be drafts of documents you are writing, your yearly objectives and evaluation, correspondence with your manager, etc.

Documents or files that you work on with others, are shared and should therefore live in a shared environment such as Teams or SharePoint. Or Viva Engage (the application formerly known as Yammer).

That said, there are still many items stored on your OneDrive that may be shared, but are still added to your OneDrive by default, such as Recordings and Whiteboards of Team Meetings and Files and Loops that you have shared in private Teams chats, and attachments from Forms.

Suggestion: instead of creating a new draft document in your OneDrive, create it in SharePoint, if it will be shared at the end. You may want to set up a document library especially for drafts. You can move it to its final place once it has been reviewed and made official. This way you will not have any old and forgotten drafts in your OneDrive.

2. Understand what is stored on your OneDrive

OneDrive has the habit of creating new Folders by itself when you do certain things in Microsoft365. The most well-known may be the folder Attachments, for files you have received as attachments to Outlook. Microsoft Teams is also a good source of automatically created folders, as Recordings, Microsoft Teams Data, Microsoft Teams Chat files, Transcribed Files are all added from your work with Teams.

Again, content you share with others in private Teams chats, will be stored in your OneDrive. It makes perfect sense, but it is annoying if your OneDrive is prone to overflowing.

Some time ago I wrote about the folders that are automagically created in your OneDrive:

Who created those folders in my OneDrive?

These folders have all been created by my use of Microsoft365. I have not created any of them myself.

Suggestion: Avoid private Teams chats and work in Teams Channels where possible. Create Channel meetings (when you know they will be recorded), chat and share files and Loops etc. in Channels so they will be stored on SharePoint rather than your OneDrive.

3. Understand the new Syncing

A new way to sync documents is on its way. I do not know the details yet, but keep an eye out, please! I learned this from Paul Keijzers’s video.
Synced SharePoint folders will then be stored in your OneDrive on your PC, if I have understood correctly. This may mean that your OneDrive also gets clogged up with SharePoint files. It may also mean that just the links will be shared, so I am curious to learn more.

How will SharePoint sync behave in future?

4. Understand what happens when you leave

Your next career move may not be top of mind right now, but it is good to know what will happen to your content when you leave the organization and your account is deleted. This may help you create new habits now.

I wrote about this earlier:

Leaving the organization gracefully

Suggestion: check on a regular basis if there is any content that would need to be in a SharePoint site or Teams, in case you would leave. It will save you time when you actually leave.

5. Clean up your OneDrive on a regular basis

Yeah, I know this is not exactly a fun task, but if you do this regularly, let’s say once a month on a quiet time of the week, it will be less work and will save you from the panic that will engulf you when you get a message that your OneDrive is full and you can no longer add new info.

I have also written about this topic:

9 steps to clean up your OneDrive

Other tips, tricks and suggestions?

Please let me know if there is something that you do, or your organization does, to keep OneDrives in check.

Number 5 by Pramit Marattha on Pixabay

SharePoint Holmes and the Missing Message

SharePoint News is easy to create and manage, but that does not mean things can not “go wrong”. This is often due to unexpected or unknown behaviour. So, you can imagine that our hero SharePoint Holmes likes the functionality! 😁

The situation

I received an issue in our support system from a News reader who saw an interesting News post on a SharePoint site. However, when he clicked on it, he got an error message. He had refreshed the page, closed SharePoint and reopened, and even logged out and back in, but he could not open it.  
(What a model employee, by the way, doing the most obvious troubleshooting actions before logging an issue. I have seen many people get into a complete panic when they get an error message, while a simple “did you turn it off and on again” could have solved the problem)

But how could that be? He saw the item, it had recently been posted in the site! 

An obvious case for SharePoint Holmes. I grabbed my problem-solving cap and set to work.

The investigation

I logged in as admin into the site and checked his permissions. This was a site accessible for all employees. Good.

Then I looked with him at the site’s homepage. The red-lined item was the problem post.

Screenshot of SharePoint site home page, with News posts. It all looks good, but there is one News post that gives an error upon clicking.
The site in question. Everything looks normal, but the red-lined post gives an error message.

When he clicked the post, this was the error message. Do you see what SharePoint Holmes sees?

Screenshot from Error message saying:
"Hmmm… can't reach this pageIt looks like the webpage at https://ellenvanaken.sharepoint.com/sites/Communicationsite/SitePages/Changes-in-the-ERP-system.aspx might be having issues or it may have moved permanently to a new web address.
ERR_INVALID_RESPONSE"
This is the error message.

Right, the site above says “Intranet” while the error message refers to a link in “Communicationsite”.

I got the same error message upon clicking the News post, (confirming once more this was NOT a permissions issue), and checked the URL of the site where the item had been posted. There was “Intranet” in the URL of the site with the issue, but the error message was for an item in a “Communicationsite”.

💡 Aha, this looked like a News post that had been created with the “News Link” option. This is an easy way to share News from one site to another. Instead of creating your own post, you can click on Add > News Link and add the URL in a popup. SharePoint will then add thumbnail, title and description, and you can keep that as is, or edit when needed. When someone clicks on the post, they will be redirected to the post in the site where it was created, in this case the “Communicationsite”.

Screenshot from SharePoint site with News web part showing what happens when you click the Add  button under News. You will get two options: News post (to create a news item from scratch) or News Link (to link to another news post in SharePoint or internet)
An easy way to share News from other sites or even the internet

First I checked whether my hypothesis was correct. I opened the Site Pages Library in the Intranet site and looked for the post. When I opened it it looked indeed like a “News Link” page: a page with the link and the Page Details, nothing more.
💡 Normally the image from the Source site would also be shown, but in this case it was missing, and this was a reason to suspect that the original News post had been deleted.

Screenshot of the page that you get when you add a Link to a News Post. In this case there is no image, which is a clue for SharePoint Holmes.
This is what you get when you add News as a link to another site (or the internet). Normally you would also see the image, but this time it is empty, another clue.

I then opened the “Communicationsite” and checked the Site Pages Library (just to be on the safe side) and when I could not see the post, I went to the Recycle Bin. And yes, there it was.

Screenshot of the Recycle Bin of the site where the News item was posted
The News post from the link has been deleted in the site where it has been posted. Links to this post will now be inaccessible.

I contacted the person who had deleted the News post and enquired about the deletion. It turned out that the deletion was done accidentally in haste, and only a short time ago, as the image was still visible. (After a few days, the image will disappear as it is no longer stored in a Site Assets Library)

The solution

In this case, the “deleter” restored the post in the Communication site and that action restored access to the News post in the Intranet site.

Of course, it will not always be as straightforward. Sometimes it can be necessary to delete a post because it is outdated and potentially harmful to keep.

It may make sense to agree on a form of Life Cycle Management for News posts within your organization, and only delete something when a post is older than 1 year, for instance, if it does not need to be deleted earlier. You may want to read “Writing SharePoint News posts – our way” for more agreements you can make with your fellow News publishers.

As News Publishers will not be able to see easily where their News items are being shared, you will never be able to completely prevent issues like the above. But it will help to inform your News Publishers about this potential issue when using the “News Link” option.

Tip: you can check if your News post has been used in another site as follows:

  • Copy the title of the post and enter this in the Microsoft365 homepage Search box (so you search all through Microsoft365)
  • Alternatively, use some keywords from the title that are less common
  • Click the News tab in the Search results
  • Check if there are more entries than yours
  • If you want to delete the item you may want to warn the Publishers who have added your News post to their site.

This will not really help if someone has posted it to a restricted site that you have no access to, or when they have changed the title, but it is an option to reduce any “damage”.

Screenshot of two News posts with the same name, indicating that one is a link to another. The News Search vertical will help filter out the News posts.
Another News post that has been added as News Link: two posts with the same name in Search, in different sites.

About SharePoint Holmes:
Part of my role was solving user issues. Sometimes they are so common that I had a standard response, but sometimes I needed to do some sleuthing to understand and solve it.
As many of my readers are in a similar position, I thought I’d introduce SharePoint Holmes, SharePoint investigator, who will go through a few cases while working out loud.

Teams Housekeeping for beginners

Most organizations will have been working with Teams for about two years now. There was an explosion of usage early in the pandemic in March/April 2020. I remember getting tons of requests for new Teams, as many people thought you need a Team site for chatting and conferencing. 😒

Many of these Team sites have never been used, at least not in my organization. Of course, the Microsoft365 admin has a role in deleting obviously unused Teams, but that is not sufficient. Team Owners and users have their own responsibility in making sure they are in the right Teams, but I know very well that not everyone has, or wants to spend, the time to do a good review and cleanup. And sometimes they do not even know how to go about it! (The psychiatrists and therapists I worked with, were not all very digitally savvy)

So, in order to avoid confusion and mess in your colleagues’ Teams setup, and colleagues complaining that “their Teams is a mess and that is Microsoft’s fault”, please help them checking their Teams on a regular basis. There are many ways that you can make Teams work for you if only you spend some time on it.

I have created a simple housekeeping flowchart. I love flowcharts and it was a good way to test-drive Visio Online! The functionality is great, but I miss the “arrange nicely” option that is in the desktop version, so please forgive me if things are a bit askew. 😊

Underneath the flowchart you will find a more elaborate description with texts and screenshots.

Feel free to use this flowchart with your audience.

You will find some more detailed instructions and screenshots below.

Step 1: Review the Teams that you are a member of

You will find all your Teams in the left-hand rail of Teams. You can manage most Team-level actions by clicking the … next to the Teams name and selecting the desired action from the popup.

The 2 Teams in my tenant.
The Team actions, with highlights on the ones that are relevant for this post

Is the Team still in use?

For each Team, first check if it is still in use. If not, you can Leave the Team and it will no longer be in your list. If you are the Owner of the Team, please Delete the Team, except when the Team has Private or Shared channels. In that case, please check with the owner and users of those channels, as those are managed differently than the regular channels.

Update 16-11-2022: You can also Archive the Team and make it read-only. This can be an intermediate solution when you want to keep the info from an important project for some time, or when someone is afraid to delete the Team altogether. My personal experience is that nobody ever looks at an Archive, so you may as well just delete the Team, but not everybody knows that yet 😁.
Instructions for archiving. Thanks to Thierry Barthel for pointing this out.

Do you still need to be a member?

❌ If you have changed jobs since you were added to this Team, you may no longer need this. Or perhaps the project in this Team has been completed or stopped, or any other change may have occurred that makes this Team no longer relevant for you.
If you do not need to be in this Team anymore, Leave the Team.

❓ If you do not know, you can Hide it. The Team will then be moved to the bottom of the list of Teams, under Hidden Teams. You can occasionally check if something has happened by clicking on the Hidden Teams and checking the Team. If the Team is useful after all, you can unhide it by clicking … next to the Team’s name and selecting “Show” from the popup.

The Demo Team is hidden and no longer clutters my list of Teams, but can be made visible easily

Alternatively, you can keep it where it is and check now and then whether you still need this. It may be a good idea to collapse the channels so you only see the Team’s name. You do this by clicking the little triangle to the left of the Team’s name. To reverse this, click the triangle again.

Teams expanded, so you see the channels that are not hidden)
When you hover over the Teams names, you will see the triangle to expand or collapse the Teams.

✅ If this Team is still relevant for you, please check the channels as in Step 2.
If you have many Teams, you can drag the most important Team(s) to the top of the list by selecting the Team name. By default, they are sorted in order of creation.

Step 2. Review the channels in the remaining Teams

If you are certain this Team is important for you, check each channel in this Team. You cannot leave a channel, but you can hide it to make it less visible (except the General channel). It is also possible to mute notifications.

You can manage most channel-related actions by clicking the … next to the channel name and selecting the desired action from the popup.

The channel actions, with highlights on the ones relevant for this post

You will have the following options:

The channel is not important
Please Hide it. Once there is a new message, the channel name will show in bold letters, but if you have hidden the channel, you will not see that until you click on “Hidden channels”. You can also decide to turn off notifications.

When there is a new message in a hidden channel, you only see it when you click on “x hidden channels”. 3 channel names are bold, so there are new posts.

You do not know yet whether this is an important channel.
Just leave it there until you know. You can also Hide it to see if you are missing something and decide to turn off notifications.

The channel is important.
Make sure you can easily find it and get notified whenever something happens in the channel.
You can Pin it to the top of your Teams list so you can quickly find it.

A Pinned channel on top of the list, so I can easily find the most important one. 😊

With the Notifications you can make sure you will quickly know when something has been added or you have been mentioned.
You will set notifications for all your Teams and channels in your Teams settings, (click the … top right of your Teams app, next to your name, and select Settings > Notifications) There are quite a lot of options so please check it out yourself.
You can deviate per channel where necessary by using the Channel notifications in the channel actions popup.

Channel notification settings. You can set these in general in your Teams settings, and individually per channel where necessary.

Hopefully this is a good first step for most colleagues! You may want to remind them once a year that they should spend some time reviewing – once Teams have been set up properly, it will most likely only need a small revision.

9 steps to clean up your OneDrive

CleanOndrive-headerAs mentioned in earlier posts, the majority of my colleagues have 2 GB of storage space in their OneDrive and some struggle to stay within those limits.

So, we are currently helping them with cleaning up and giving them some tips on how to keep within boundaries. It may be interesting for you as well!

1. Empty the Recycle Bin

You may want to start with a clean slate, so let’s empty the Recycle Bin first. If, during cleaning, you accidentally delete too much, you will have fewer documents to search through for restoring. Also, emptying the recycle bin will free up space!

CleanOnDrive-recyclebin
Click “Recycle bin” on the left-hand side and then “Empty recycle bin”

2. Check the size of your OneDrive

It helps to know how much stuff you have, and how much you need to remove. So, click on the Gear wheel top right, click “OneDrive settings” and then select “More settings”. You will pass a useful screen with notification options – worth looking at but out of scope for this post.
Then click “Storage metrics”.

CleanOnDrive-size
Almost there!

On the next page you will see the lists in your OneDrive site collection (it is a SharePoint site collection, after all) and the amount of free space is shown top right.

Cleanondrive-storagesize
Look at the top right of the page to see how much free space is left.

3. Move shared documents to SharePoint or Teams

Sharing documents in OneDrive to collaborate on is great as long as the document is not final. Once it is final, please move it to a SharePoint site so it can be part of the team’s collective knowledge and make room in your OneDrive.
Do not hoard shared OneDrive documents – if you leave the organization your OneDrive will disappear with all its content. (After a period when your manager can access it.) We frequently get questions about lost shared documents as many people appear not to be aware of this. 😦

Do you plan on leaving the organization soon? Check out this post to see what to do – and start now.

So, check out which documents you share and with whom. Do you still need them at all? Do you still need to share them or are they ready to live elsewhere?

cleanOnDrive-shared
The overview of the documents I share with others – “Departmental docs” sounds like an excellent candidate to be reviewed and moved!

If you want to move the documents to SharePoint, go back to your “My One Drive” section, select them and then click “Move To” from the grey bar and select the SharePoint site where they will live. (Make sure you follow that site so it appears as one of your first choices). The documents will be deleted from your OneDrive in the process. (If you want to know how Copy To and Move To work, read my earlier post and also my post about the risks)

CleanOnDrive-moveto
Moving documents to a SharePoint site

If you have many documents to move, you may either want to do it in smaller batches or use Copy To and delete the documents after you have checked that they have all safely arrived at their SharePoint destination.

And if you no longer need the documents you share, you can just delete them.

4. Create or Request a SharePoint or Teams site

In case you have no location at your disposal, create or request a SharePoint site or a Team (which comes with a SharePoint site) so you can share documents with your project team or department.

5. Find the largest and the oldest documents

Unfortunately you will have to do this by folder, as you can not create views without folders. Although OneDrive is a SharePoint site, it misses some cool SharePoint functionality, such as the option to add metadata columns and create views, or the possibility to add templates. (note to self: submit to User Voice 🙂 )

The following paragraph has been added in May 2020:
* Please be aware that Microsoft365 adds folders to your OneDrive when you use certain applications. The “Attachments” folder to store email attachments is one, but Apps (contains Forms documents), Microsoft Teams Data, Microsoft Teams Chat files and Pictures can also contain a lot of documents that you may not be aware of.  Read my post on this topic*

Open a folder and click on the pull-down arrow next to the File size column and click on “Larger to smaller”.  Determine whether the largest files need to stay on your OneDrive. They may fit on your SharePoint or Teams site as well, so you can Move them there, or perhaps they can be deleted.

cleanondrive-sortlargest

Then sort for the oldest documents by clicking the pull-down arrow next to the Modified column and selecting “Older to newer”. Generally you will have accumulated quite a lot of documents in your career. When projects have been completed or interest has waned, you might as well move them to a SharePoint archive site, a records center (in that case they should have been moved there long ago!) or delete them.

6. Remove versions

This can make sense for very large documents that you have worked on intensively and that you want to keep. There may be several versions that take up space.
Select the document, click the … to the right of the name, and select “Version History” from the menu.

CleanOnDrive-remove version1
How to go to the version history

You will now see the versions.
If you are still working on the document, it may be safer to remove the oldest versions only.

CleanOnDrive-rremoveversion2
Click the version you want to remove and select “Delete Version”. Repeat if needed.

If your document is final, you can delete all versions and keep the latest version only. If there are many versions involved, the quickest route is to go to the Storage Metrics (see par. 2), click on “Documents” and drill down until you see the document.

Ondrive-versions3
This is a good way to remove all versions in one go.


Click “Version history” on the right of the document and then you will see an option to delete all versions in one go, leaving the last one.

ondrive-version4
This is the best way to delete all versions in one go.

7. Move private files to a personal location

While it is all too common to have a mix of private and organizational docs on your systems, your OneDrive is primarily meant for organizational stuff. Your private info should not be here, especially if it takes up valuable storage space.  You also do not want to lose it when you leave the organization, right? So, move your personal files and photo’s to your private OneDrive (now with extra-secure Personal Vault), iCloud, Google Drive, a USB stick or another place.

8. Empty the Recycle Bin and check storage

Hopefully this has helped you get below that 2 GB. If you, you need to repeat and be a little more strict this time around!

9. Repeat regularly

In order to stay below the limit, go through these steps again on a regular basis.

10. Bonus tip: Give your folders different colours

(Added December 2023)

If you have many folders and would like to see in one glance what is what, you can now give your folders different colours. How cool is that?

Greg Zelfond explains how to do it and what to look out for: https://sharepointmaven.com/how-to-color-code-folders-in-sharepoint-and-onedrive/

Do you have tips?

Do you have experience with colleagues whose OneDrive fills up quickly? Any suggestions that we can use?

5 steps to clean up your Outlook on-the-web mailbox

CleanOutlookheader

This post has been revised and updated May 1, 2022.

Some time ago we introduced the Microsoft365 F3-license into our organization. I work in a health care organization and the majority of our staff is providing care and counseling to our clients and patients. They work mostly with the official patient/client data application. They do not use Office365 heavily.

The F3-license differs in some aspects from the E3 or E5 license used in larger and more office-based organizations, for instance:

  • No desktop apps – it is all online
  • 2 GB Outlook mailbox instead of 100 GB
  • 2 GB OneDrive instead of 1 TB
  • No Delve app visible (on the Office365 landing page) or available (on mobile devices) – but I have a workaround

For more differences, please read my post “Some quirks of the F3 license“.

What happens when the mailbox reaches 2 GB?

When a F3-user reaches 1,98 GB of storage space, they will get a warning message. 1,98 GB is default, but the warning limit can be lowered by the Exchange admin if you want to give people more breathing space.
People will also no longer be able to send messages at that point. So it is important to keep well away from 1,98 GB.

When we made the change, about 10% of users had more than 2 GB in their Outlook on-the-web mailbox, so we sent them a message about what was going to happen and gave them suggestions for cleaning up.

What should you do to reduce storage?

I have noticed that there is a vast amount of support for Outlook on the internet but it is mainly for the desktop app and trust me, there is a BIG difference between the Outlook desktop and Outlook on-the-web.
BTW, I just found Nate Chamberlain’s tips to clean up your Outlook desktop!

So, here’s what we advise our colleagues. Feel free to re-use and embellish!

1. Empty the Deleted Items folder

Apparently there is no tenant-wide option for Outlook-on-the-web to empty the the Deleted Items folder when you log out. (It is possible for the desktop app)
So, it is possible that you have years of Deleted Items in that folder, eating up space! If you know your Deleted Items are there to be deleted, the fastest way is this:

  • Right-click on the name Deleted Items in the left-hand menu
  • Click “Empty Folder”
CleanOutlook-deleteditems
You do not even have to open your Deleted Items folder in order to empty it!

If you have > 500 messages in there, or if you want to check what you are deleting, it may be best to do this in batches:

  • Open the Deleted Items folder
  • Select a number of messages
  • Click “Delete” from the top bar
  • Repeat when the selected items have been deleted
CleanOutlook-selecteditems
Open folder, select items and click Delete is a more gentle way to clean up.

The deleted messages will be stored in a new place. You will see this in your Deleted Items folder, called “Recover items deleted from this folder”.
The “Recoverable Items” works like the SharePoint or OneDrive Recycle bin. You can restore messages back to their original location within 14 days (default) or longer (tenant setting) after deletion.
Items in the “Recoverable items” do not consume storage space.

CleanOutlook-deleteditemsrecoverable
I only recently discovered this nifty option to recover deleted emails! It is in the Deleted Items folder.
CleanOutlook-recoverable
You can restore deleted items back to their original location, just like OneDrive.

Select an item, click “Restore” and your message will be back to the original folder, i.e. Inbox or Sent Items or what not.

Now that your Deleted Items is empty, let’s go to the next step.

2. Check storage space

Which folders consume most storage space?

  • Click the Gear Wheel top right and then “View all Outlook settings”
  •  Go to “General”, then click “Storage” and you will see how much you are using, both graphical and numeric. Nice!
Here you can see how much you keep in each folder, sorted by size.

You can quickly delete from here, by clicking the arrow next to Delete, and selecting an interval. I expect that in most cases you will want to check the contents first, however. (Although I once sat with a user who discarded the “12 months and older” from her Inbox without blinking an eye, as she had switched jobs a few months before and did not need the content from her old job.)

You can remove mails based on their age on this page.

3. Clean up your largest folders

Deleted Items, Inbox and Sent Items are generally the main storage space hoarders. Depending on your organization’s settings, Junk Mail can be a biggie, too.
So let’s start there with two sorting exercises:

a. Delete largest items

In your Inbox, click Filter (top left), then Sort on Size, largest on top.
Check if you still need these messages. If they contain large attachments, save the attachments to OneDrive. You can move them to SharePoint later, if needed.
If the email text is important, you can save it as a PDF and store it on OneDrive or SharePoint.
Delete the message once you have safeguarded the content in another place. Or just delete it if it is no longer of value.

CleanOutlook-filterlargest
How to sort the contents of a mailbox folder on size.

b. Delete oldest items

In your Inbox, click Filter (top left), then Sort on Date, oldest on top.

Do you really still need the oldest messages? If yes, turn them into a PDF and store in OneDrive or SharePoint before deleting.

c. Repeat for other folders

Repeat steps a. and b. for Sent Items and any other folders that contain a lot of data.

4. Repeat steps 1, 2 and 3 if needed.

I have helped a lot of colleagues through this process and these steps were usually sufficient to get below the 1,98 GB threshold. If not, you will have to redo it and be a little more strict.

5. Auto-empty the Deleted Items folder.

Now that you have a cleaner mailbox, you will want to keep it that way! You can empty your Deleted Items automatically after sign-out as follows:

  • Click the Gear Wheel top right and then “View all Outlook settings”
  •  In Email, go to Message Handling, check the first box and click Save.
CleanOutlook-emptydeleteditems
How to make sure your Deleted Items is emptied on a regular basis.

It was fun writing this post – my own mailbox is smaller now as well 🙂

7 steps to clean up unique permissions

cleanup-headerIn my latest post I showed you how you could limit the options to share the content in your site. I hope that you have made some decisions, so now it is time to clean up the mess.
Let me remind you why too many options to share can turn into a problem:

  • Sharing a document or list item, or using the “Get a Link” option, creates unique permissions, and that means that the permissions of a document or list item no longer follow the permissions of the site. So if you add a new group (recommended) or a new person (not recommended) to the site, this group or person will not automatically get access to those items.
  • This will lead to unexpected access denied messages and therefore Access requests.
  • Approving Access requests may lead to more unique permissions AND they give people Contribute permissions by default, which may be too much.
  • Unlimited sharing (especially with external users) can lead to your documents falling into the wrong hands.

So, how to take back control of your site after you have changed some of the settings?

Have a note-taking system ready – paper, OneNote, Notepad, document – whatever is your thing. You will need to make some notes.

1. Process pending Access requests

Go to Site Settings > Access Requests and Invitations and see who has requested access.
Click the … next to each name and add people to site groups as much as possible. If you do not see the site group mentioned, note down their names with the group that you want to add them to.

2. Remediate content with unique permissions

a. Go to Site settings > Site permissions and click on this link:

Cleanup-Show items
Show the items with unique permissions, intended and accidental. Very useful functionality!

b. You will get a pop-up with all lists and libraries that have different permissions.

Cleanup-showitemsiwhtuniquepermissions
Focus on the lists with “View exceptions”. Those contain the items where you have created unique permissions by accident.

c. The items marked as “manage permissions” are usually lists and libraries that have different permissions by design. Skip these.
d. Click on “view exceptions” for the first list or libraries that has this mentioned. You will see all documents (including pages and images) or list items that have unique permissions.

Cleanup-Documentswithuniquepermissions
List of documents (or items) that have unique permissions. Rightclick “manage permissions” and open the link in a new tab.

e. Using Rightclick > Open in new tab, click “manage permissions” for the topmost item.  (If you just click “manage permissions”, you will have to start at a. again for the next document or list item)
f. Check if there are any people mentioned that you may want to add to one of the site groups, and note down their names + intended site group.
g. Click “Delete Unique permissions” to re-inherit the permissions from the list or library.

Cleanup-deleteuniquepermissions
After noting down Kimberley B as a potential Visitor click “Delete Unique Permissions” to bring the document’s permissions in line with the rest of the document library and site.

h. Repeat steps e, f and g for the next document or list item.

3. Weed out “limited access”

Limited access is an annoying thing that tells you that there are, or have been, unique permissions – or it may mean nothing at all.
If this site has existed for some time and you do not know it very well, you can skip this step for now because you might remove people who are there for a good reason.

a. Go to Site settings > Site permissions and click on this link:

Cleanup-Show users
Show people with limited access. This can be caused by Sharing, Get a Link or accepting an Access request.

b. Check if there are any people mentioned that you may want to add to one of the site groups, and note down their names + intended site group.

Cleanup-RemoveKimB
You can remove Kimberley B from this page. (“Beperkte toegang” means “Limited Access”)

c. Remove any individual users so you are left with only the site groups.

4. Add the new users

Add the users that you noted down during steps 1, 2 and 3 to their respective groups.

5. Review the Members group

During the time that you had no restrictions, Members may have added other Members.  Review your list of Members and change their roles or remove them where needed.

6. Replace any “breaking links” on your pages

Hover over every link on every page in your site and look at the link in the bottom-left of your screen. Links of the “Can View” or “Can Edit” type  will generally have  “guestaccess”  in their link and they will cause unique permissions.

When I did not know all this yet, I had created some Promoted Links with the “Get a Link – Can View” link to a page. As soon as I created the link, the permission inheritance for the page was broken and everyone who clicked on the link was added as individuals to the page.

Cleanup-GetaLink
Link “”Document 5″has been created with “Get a Link”. The URL is: …../Team/Share/_layouts/15/guestaccess.aspx?/….

Replace every one of those links with the “Restricted Link” equivalent.

7. Monitor

Review on a regular basis if the restrictions and the cleanup work make you feel more in control of your site. Depending on your choice of measures, you may need to do more approvals from Visitors or Contributors who want to share content.

How have you dealt with the “Unholy trinity of creating unique permissions” 🙂 ? Would you like to share your frustrations or have you found a good way to deal with this that other readers can benefit from?

Image courtesy of artur84 at FreeDigitalPhotos.net

Organizational change and your SharePoint sites

OrgChangePawnsSharePoint” or “the intranet” is generally not the first thing people think of when an organization changes. But there will always be a moment when people are looking to align their teamsites to the new organization structure.

If you are supporting SharePoint users in your organization, this may be a good “toolkit” to support site owners who are confronted with a major change.
I wrote the following posts earlier, but I have now ordered them
from overview to detail, which suits the process better.

1. Handover

TeamSiteinheritanceFirst, the new owner should know what (s)he is the owner of.
Which site(s) are in scope, how are they related, what do they contain and who can access what?
Of course this should ideally be done by the former owner, but in real life this is not always feasible, since the former owner has generally left their position by the time the new owner arrives. I have to step in quite often.

In “Congratulations, you have inherited a teamsite!” you can find the first steps toward new ownership. 

2. Review and adjust

OrgchangeWhen the new site owner knows what (s)he has inherited, it is time to review the content. Is all content still relevant, do subsites or documents have to be moved to another place, can stuff be archived, does content have to be updated or new content have to be created?

In “12 things to do in your team sites after organizational change” I have listed a number of items to review regarding Content, People and Pages.

3. Change

While the new owner will probably make the first adjustments during review , there are some more detailed changes that need careful investigation and planning beforehand. When changes in metadata are required, for instance, you have to understand how your list or library has been set up, and how a change is going to affect your content. There is a big difference in behaviour of a library that picks metadata from a Choice field compared to a Lookup List.

Change-PictureIn “Ch-ch-ch-ch-changes part 1” you will find info on changing

  • Site name/URL

  • List or library name/URL
  • View name/URL

Changes-image2And in “Ch-ch-ch-ch-changes part 2” I have listed how to change

  • Columns

  • Folders

  • Documents and List items

Do you have other suggestions to help new site owners on their way?

Top Image courtesy of Graphics Mouse at FreeDigitalPhotos.net

Congratulations! You have inherited a teamsite!

TeamSiteinheritanceThere have been many organizational changes in my company recently and many sites have changed hands, not always with a proper handover.

A new “heiress” approached me and asked if I could help with getting her started in her sites. She is now managing all sites for her business, and although she is not responsible for all content, she is the go-between for her business and my team. She has managed a site before, so she knows her way around SharePoint, but not on this scale.

Since I get this type of request quite often, I thought I’d note down the actions we took, so I do not have to reinvent the wheel next time. It may help others as well.

Step 1: the Site Collection Admin provides information

  1. Provide her with a list of all the sites and Owners for her business.
  2. Adjust people in the top Owners permissions group to the new situation.
    Since Owners never own their own group in our setup, they can not add any new people in that role. It has to be done by a group that is more senior in the site collection; generally the Business Owner of the site collection or the IM team.
  3. Check to which sites this Owners group has access, and make sure that this group has access to all sites in this business.
    This helps with getting an overview of the content, and will enable her to provide support where needed.

    BevOwners
    Checking to which items this group has access.
  4. Check ownership of the Owners groups in all relevant subsites and change ownership where needed to the top Owners group.

    Group Ownership
    Group Ownership settings

    That way they have control over the Owner groups in the subsites.

  5. Send screenshots of the “Site Contents” of every site to the new owner, so she can compare what the SCA sees (everything) and what she sees.
    There may be list and libraries that have not been shared with the Owner and that can lead to problems.

Step 2: The new Site Owner checks and adjusts content and permissions

  1. Open every site and check permissions. Is the Owner a group? Are there many individual permissions? Do you see “Limited Access”? That may mean that document libraries or lists have broken permissions. (=different from the rest of the site)
    Note the sites with apparent complications and investigate and ask your IM team for help if you do not understand something.
  2. Open each list and library and check permissions. If they have broken permissions, check if this is necessary for this content.
    If you see no reason to have broken permissions, inherit permissions again.
    If it is necessary to have different permissions, adjust permissions where needed and add “different permissions” to the description of the list or library.
    This will make it easier to support – if people report an Access Denied you can see immediately why this may occur.
  3. Follow the instructions in “12 things to do in your teamsite after organizational change”

It was a lot of work, but doing this upfront helped her understand the content and setup she had inherited. She now feels more confident.

What else you do to help your new site owners get started?

Image courtesy of Stuart Miles at FreeDigitalPhotos.net